The ClientForge “LLM Context Exporter” Feature
The LLM Context Exporter is a one-click tool that exports all the important context from any item in your ClientForge stack – campaigns, niches, problems, solutions, offers, or ICPs – into a structured, AI-ready format you can paste directly into ChatGPT, Claude, or any other AI chat.
Instead of manually copying and pasting individual fields from your campaign into an AI prompt, the Context Exporter packages everything up for you: your strategy, email copy, performance metrics, funnel config, relationships to other stack items, and more.
You’ll use this a lot when writing cold emails with AI, iterating on campaign strategy, or doing any kind of AI-assisted analysis of your campaigns.
Where To Find It
The Context Exporter lives on the detail page (the “show” page, not the edit page) of every stack item type:
- Campaigns
- Niches
- Problems
- Solutions
- Offers
- ICPs
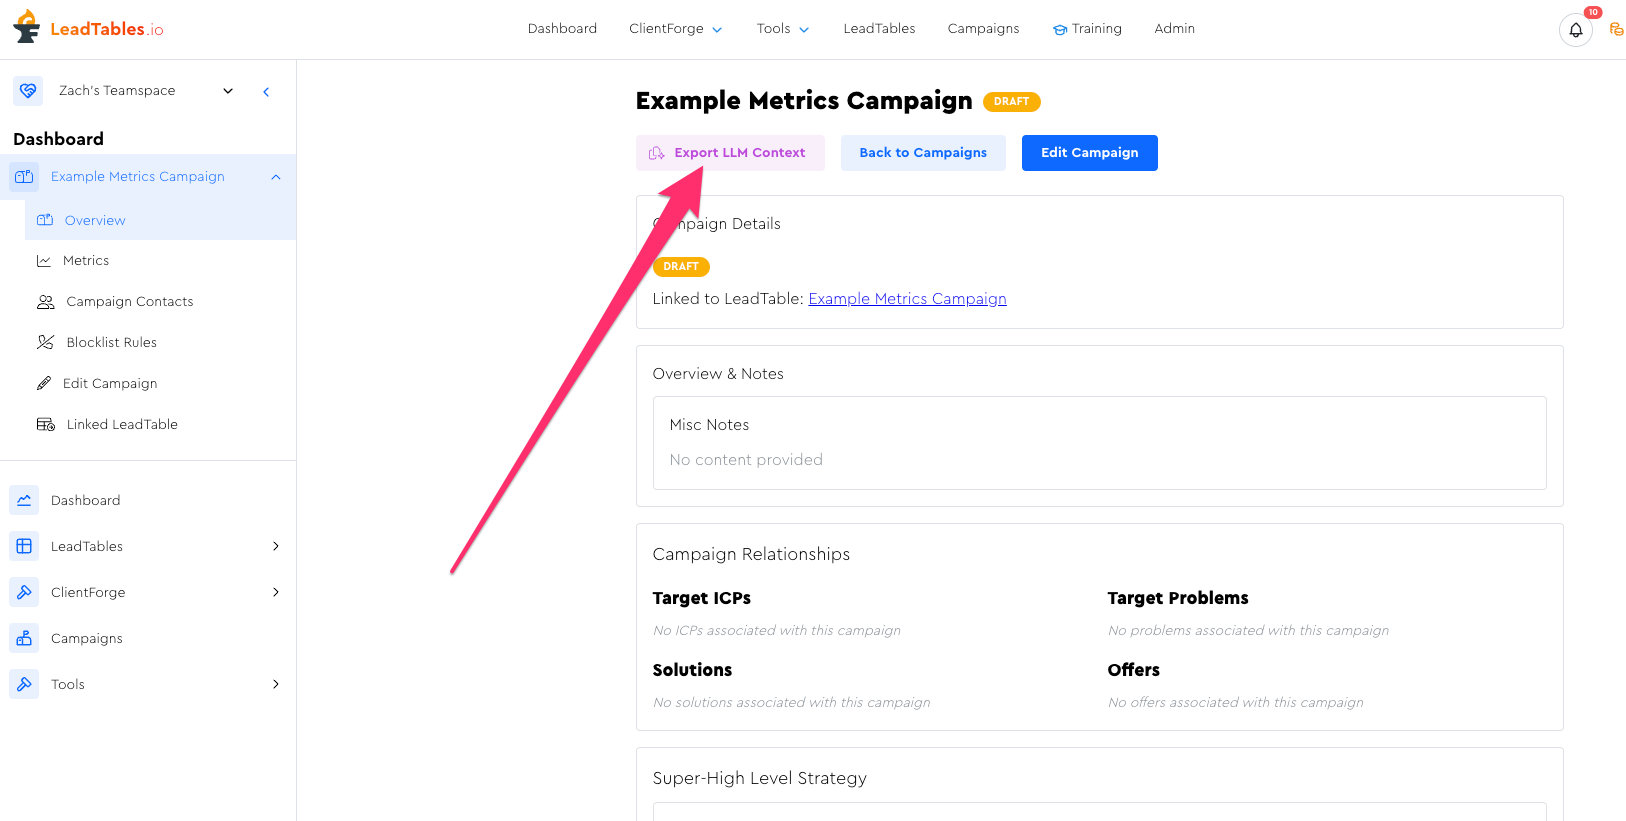
Navigate to any stack item — for example, go to Campaigns, then click on a specific campaign to open its detail page.
In the top action bar (next to buttons like “Edit Campaign” and “Back to Campaigns”), you’ll see a button labeled “Export LLM Context” with a sparkle-clipboard icon to the left of the text.
How It Works
Click the “Export LLM Context” button and a drawer panel will slide in from the left side of the screen.
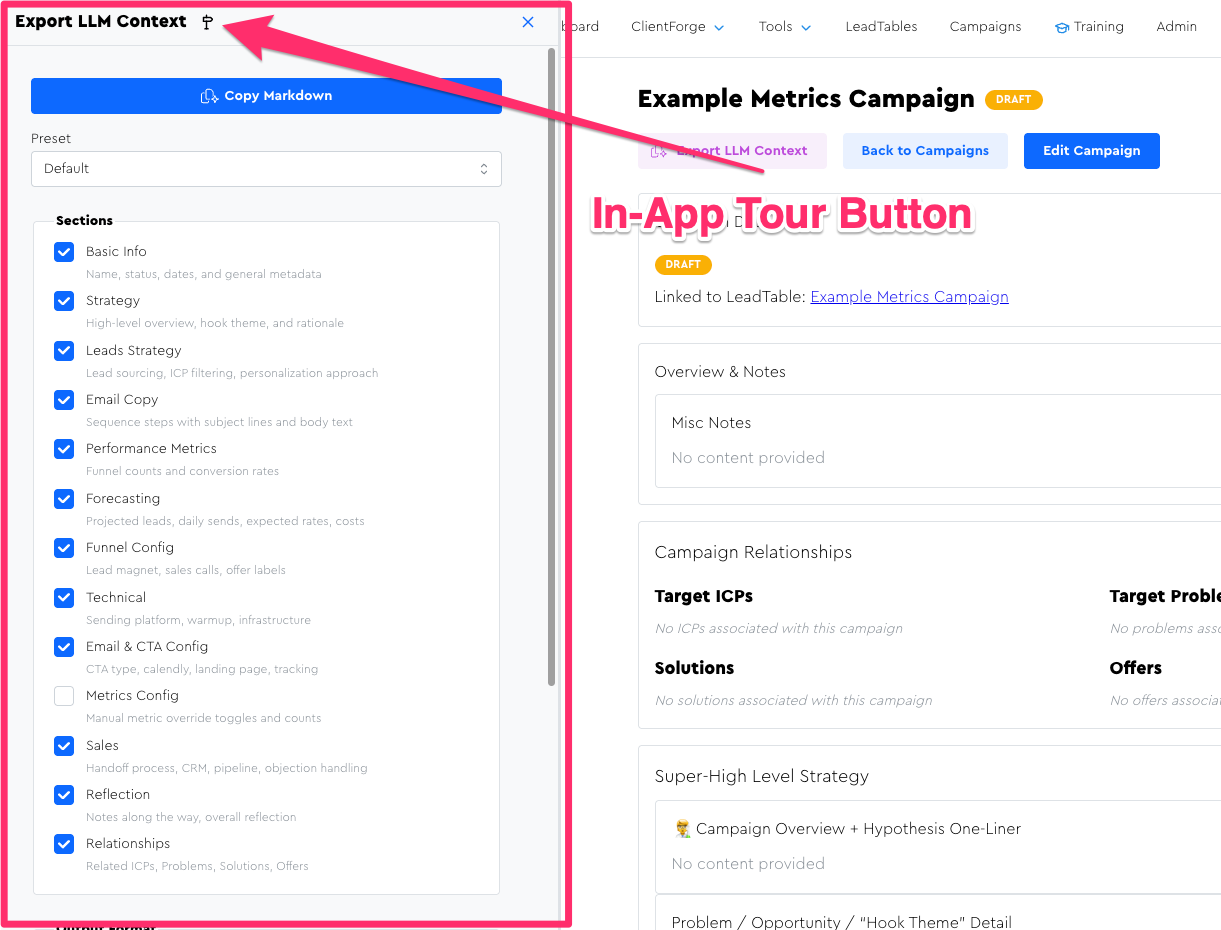
The drawer has four main areas from top to bottom; you can also use the in-app tour button to be walked through them:
1. The “Copy Context” Button
A full-width button at the very top that says “Copy Markdown” (or “Copy JSON” if you’ve switched to JSON format). This is the main action — click it when you’re ready to copy.
2. The Options Form
This is where you control what gets exported. There are a few controls here:
Preset — A dropdown at the top that lets you choose from pre-configured option sets (more on this in a sec).
Sections — A checklist of toggleable sections. Each one controls whether a category of data is included in the export. For campaigns, you’ll see sections like “Basic Info,” “Strategy,” “Leads Strategy,” “Email Copy,” “Performance Metrics,” “Forecasting,” “Funnel Config,” “Technical,” “Sales,” “Reflection,” and “Relationships.”
Output Format — A toggle between “Markdown” (the default) and “JSON”. For pasting into AI chats, Markdown is almost always what you want.
Relationship Depth — A toggle with three options:
- “Names Only” (default) — Related items are listed as simple bullet points with just their names
- “Names + Key Fields” — Each related item includes a few key attributes below its name
- “Full Context” — Each related item gets its own complete context block at the bottom of the export (this can get long!)
Include empty fields — A switch that, when turned on, shows fields that have no value yet (rendered as an em dash placeholder). Useful when you want the AI to know a field exists but hasn’t been filled in.
3. Token Estimate
A small badge below the options showing an approximate LLM token count for the generated output. It uses a color-coded ring: green (under 50,000 tokens), yellow (50,000-120,000), red (120,000+).
(NB: I may change the color coding number thresholds over time)
For most single-campaign exports with the default settings, you’ll be well under 5,000 tokens — easily within any modern AI’s context window.
It only gets big if you crank up relationship depth to “Full Context” on a campaign with lots of linked ClientForge Stack Relationships.
4. Preview
A collapsible section at the bottom labeled “Preview.” Expand it to see a read-only preview of exactly what will be copied to your clipboard. You don’t need to expand this to copy — it’s just there if you want to inspect the output first.
Using Presets
Before messing with individual options, you can pick a Preset from the dropdown at the top of the options form. Presets are pre-configured option sets that make common use cases a one-click thing.
If you tweak any individual option after selecting a preset, the dropdown switches to “Custom” to indicate you’ve deviated from the preset.
For non-campaign stack items (niches, problems, etc.), only “Default” and “Max Context” presets appear since the campaign-specific ones wouldn’t apply.
Copying and Pasting
When you’re happy with your options, click the “Copy Markdown” button at the top of the drawer.
The button will flash green for about a second and the text changes to “Copied” with a checkmark icon, confirming the copy was successful.
Now open your AI tool of choice (ChatGPT, Claude, etc.) and paste it in. The exported markdown is structured with clear headings and labeled fields, making it easy for the AI to parse and reference specific information.
Important Things To Know
- The export does NOT include your leads/contacts list. It includes the campaign’s configuration, strategy, email copy, and metrics — not individual lead records.
- Fields with no value are hidden by default. If you want the AI to see that a field exists but is empty (e.g., so it can suggest what to fill in), turn on the “Include empty fields” switch.
- Changing any option automatically rebuilds the export. There’s no “regenerate” button — switching a checkbox, changing the format, or adjusting relationship depth immediately updates the output and token estimate.
- You can export from any stack item, not just campaigns. Exporting a Niche gives the AI your niche research. Exporting a Problem gives it your problem assessment. You could even paste multiple exports together (e.g., Niche + Campaign) to give the AI richer context, though this is usually unnecessary if you bump up your relationship depth.
Tips For Using The Export With AI
When pasting the export into an AI chat, I usually like to do it “multi-shot style” where I send a message like this:
I'm about to send you a prompt, but first I need to give you some key context, which I'll paste below.

(I'll mark it with `<CONTEXT START>` and `</CONTEXT END>`)

Please read it and reply with "I'm ready" when you're ready for my prompt.

---

<CONTEXT START>

«TODO PASTE CONTEXT EXPORTER OUTPUT»

</CONTEXT END>

---

Are you ready for my prompt?
This gives the AI all the context before it receives instructions, which tends to produce better results.
By doing it in a standalone message like this, it gives you a nice “chat branch point” too so that you can branch chats off of its “I’m ready” response whenever you need to clean up your context window and reset.