How To Do A “Tag-Only” Import
If you ever want to add a tag to only some specific leads you have in an external spreadsheet, this tutorial’s for you.
(It’s especially useful if you’re ever backfilling Campaign data into LeadTables, i.e. if you sent 5 campaigns in Instantly prior to setting up LeadTables, and you want to create those old campaigns and associate your leads.)
How To Do A Tag-Only Import
To do a “tag-only” import, you can use the regular spreadsheet upload wizard.
- Companies — If you’re doing this for companies, unmap all the fields except domain (or whatever company unique identifier).
- Contacts — For contacts, unmap all except for email & domain (or whatever company unique identifier).
Here are the steps…
- Create a spreadsheet comprised only of your special leads you want to tag.
- Go into the LeadTables Spreadsheet Upload Wizard in either the companies page or contacts page for your LeadTable.
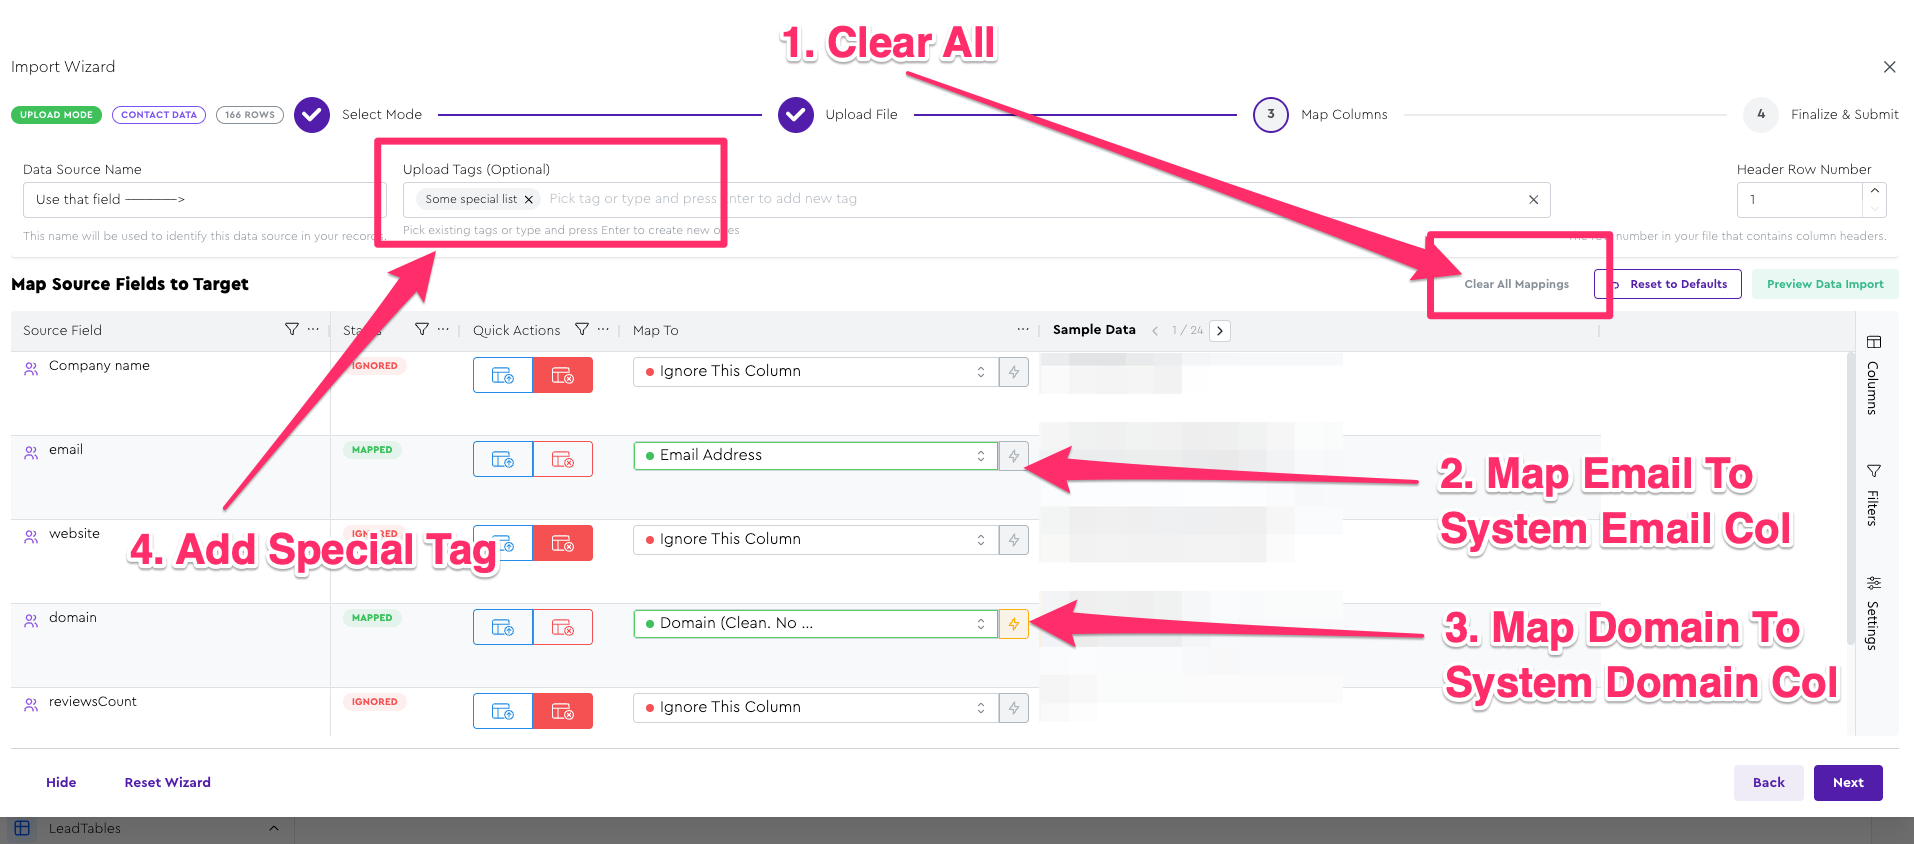
- Upload your spreadsheet; you should be taken to the “Map Columns” step of the Spreadsheet Upload Wizard.
- Clear all mappings.
- Map unique identifier(s). (email + domain for contacts; just domain for companies)
- Select the tag you want to add to them in the
Upload Tags (Optional)field in the uploader mapping screen. - Click “next” to go to the Mapping Finalization step.
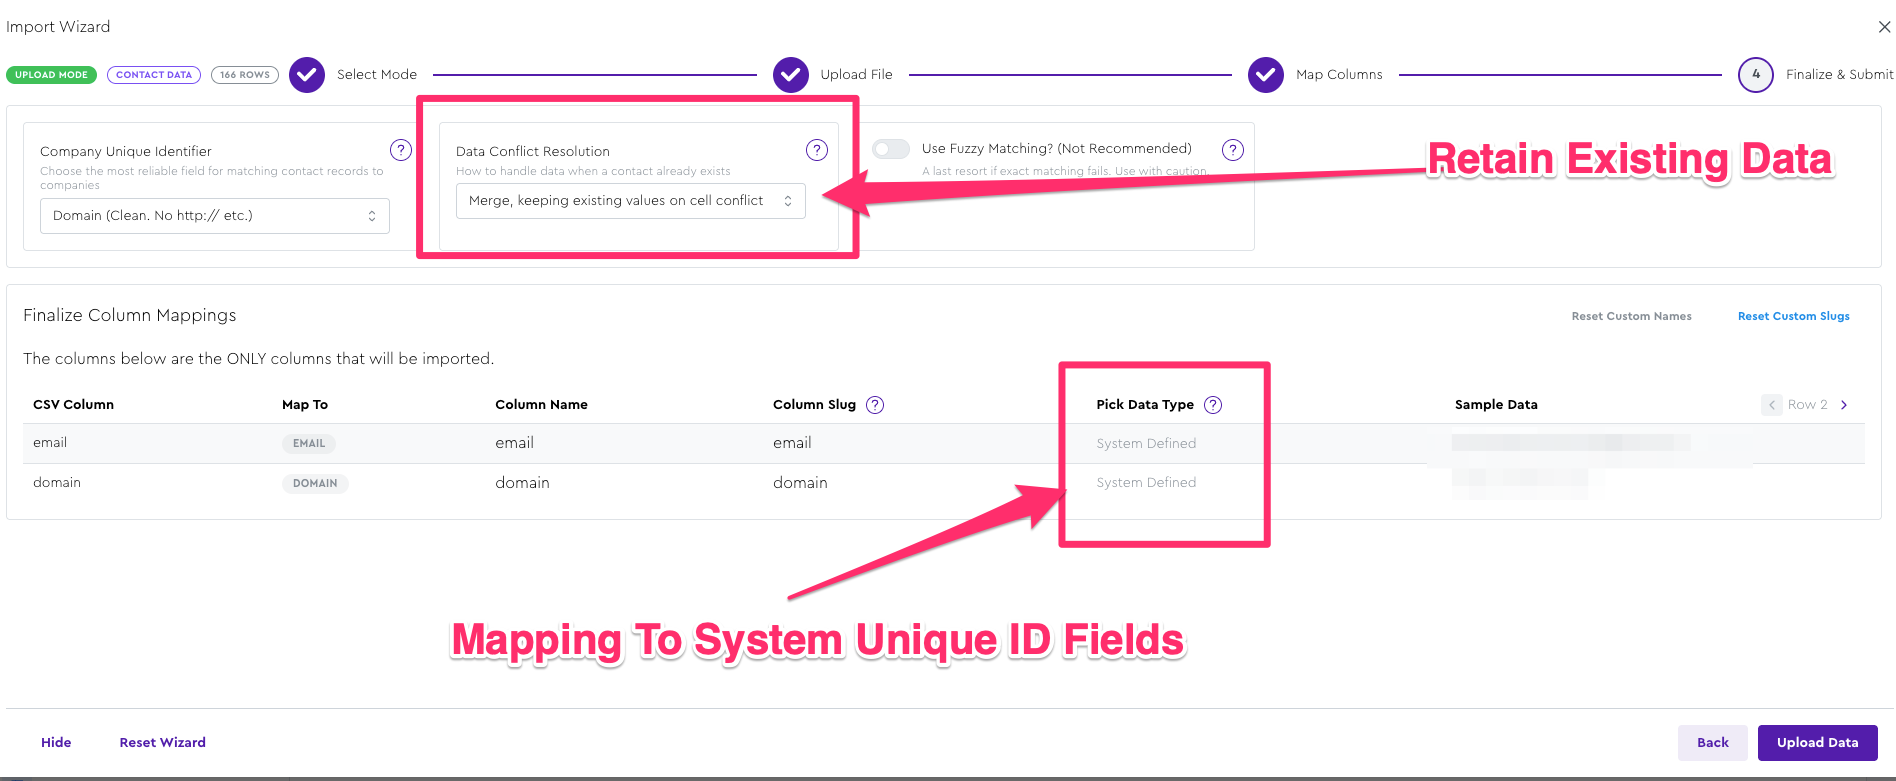
- On the Mapping Finalization step, confirm you’re preserving existing data on conflict in the
Data Conflict Resolutionfield. (It should be, by default) - Also check that you mapped your unique identifiers to the actual system cols vs. accidentally creating new fields for them.
- Run the import and your new tag will be applied!
- From there you can filter these leads by tag and do whatever special stuff you want to them. 🙂 (e.g. associate them with your new backfilled Campaigns)