Saved Views
My maybe-actual-favorite LeadTables UI feature is the “Saved Views” feature.
Basically, saving a view allows you to store as much/little of your table’s currently-displayed…
- Filters
- Sorts
- Column visibility
- Pinned columns
- Column order
- Column widths
…As you want, so that you can quickly get all this nifty shizz back later.
This is really useful for things like…
- Experimenting with different ICP filtering
- Specialized views for enrichment vs. list-building
- Specialized views for seeing lead finalization status
- And more!
I’ll plan to also eventually have the ability to store pinned yields and table-wide settings in there, but that doesn’t exist yet at the time of writing.
Saving a New View
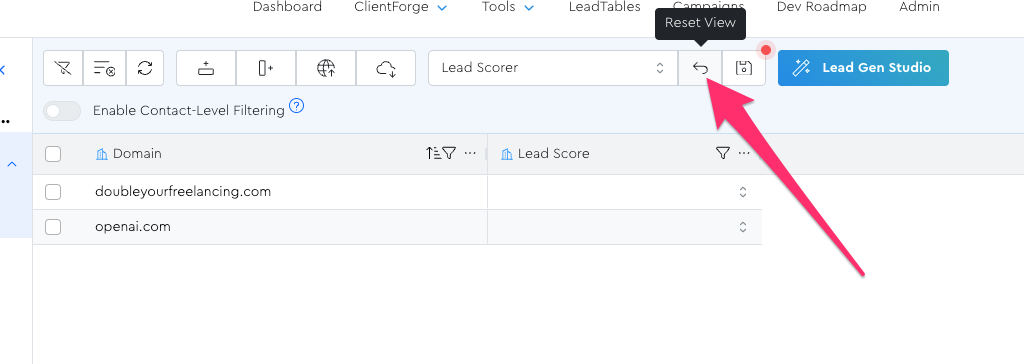
To try out the Saved Views feature, open up the Columns Tool Panel and hide everything except domain and lead score. Also drag lead score up in the panel so that it’s right next to domain:
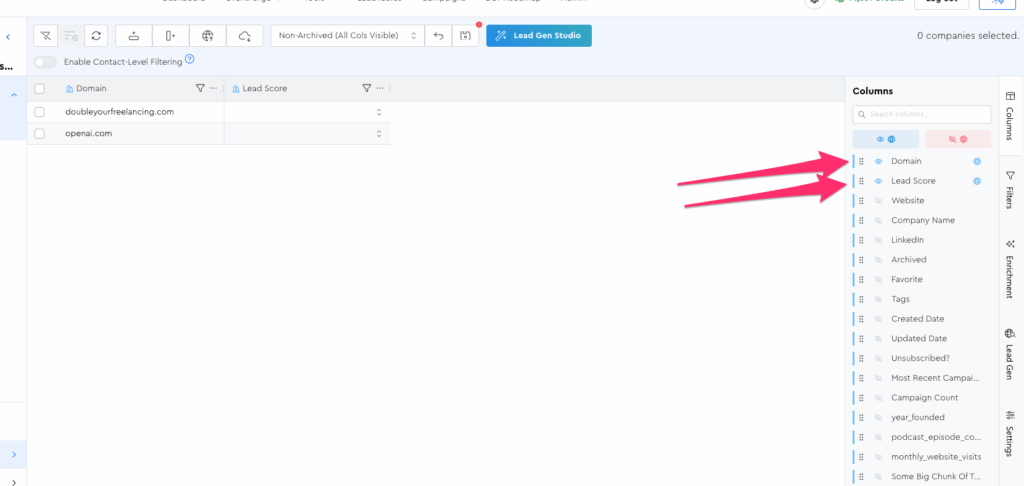
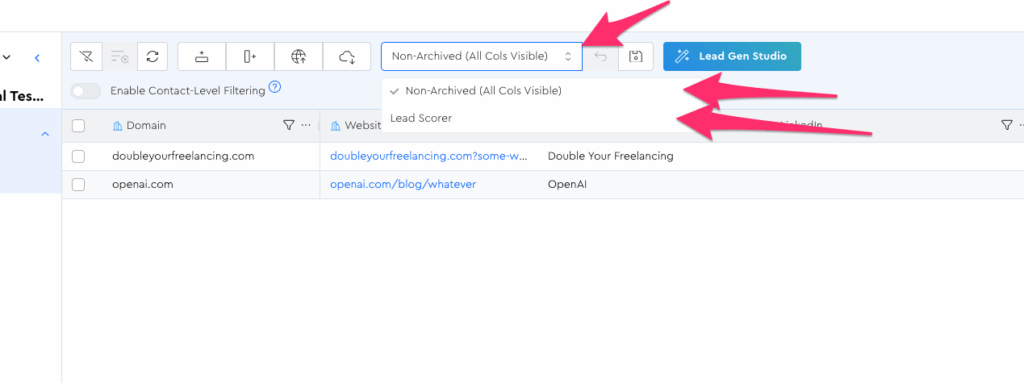
You’ll notice that the little floppy disk icon next to the Saved Views dropdown has a red dot next to it, indicating that the grid’s current state has diverged from the Saved View’s stored state.
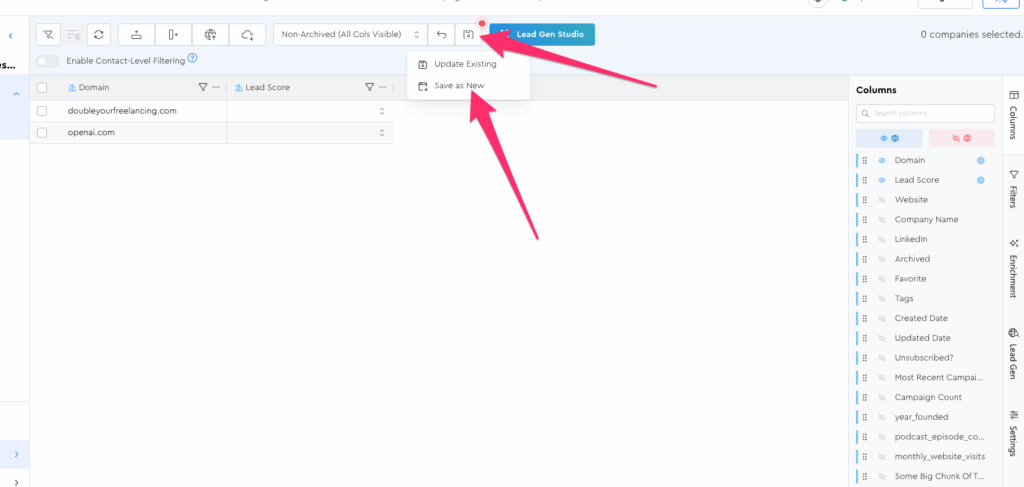
Click that floppy disk to save, and choose “Save as New”
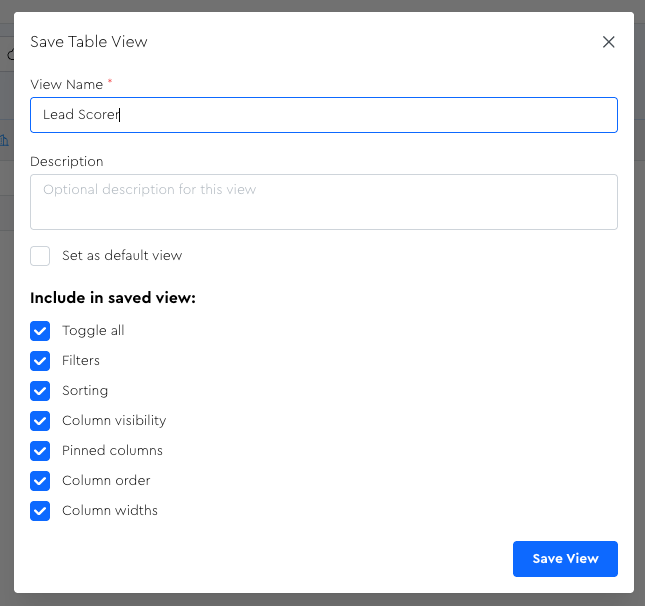
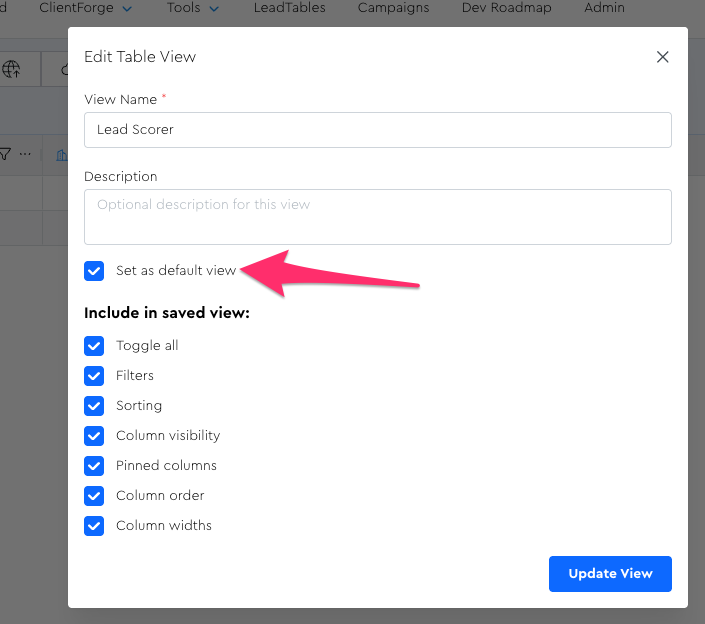
Call this one “Lead Scorer” and leave everything at the default.
Now this is where things get fun…
Now that you’ve saved this view, you can switch back and forth between it and the default in the dropdown, and watch your grid state magically change to whatever you saved.
Nifty Things To Know With Views
Default View
You can click the “set as default view” box to have this view pre-loaded whenever you open this LeadTable.
Resetting Your View
If your grid state diverges from the saved state of your Saved View and you want to revert it back to that saved state, you can click the Reset View button.
Overwriting Saved Views
One nifty thing about how I built this is the “full or partial view overwrites” feature.
If, at any moment, you want to save some/all of your current table state into one of your views, you can.
Just click the “Update Existing” option in the view-saving dropdown.
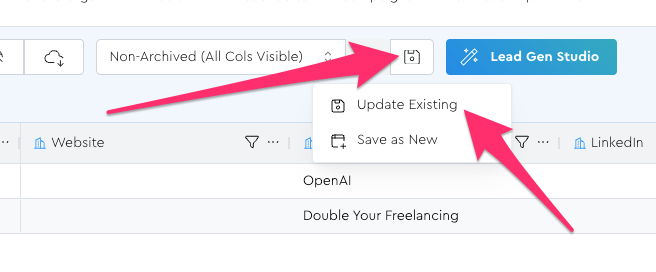
When you do, you’ll see a modal like this:
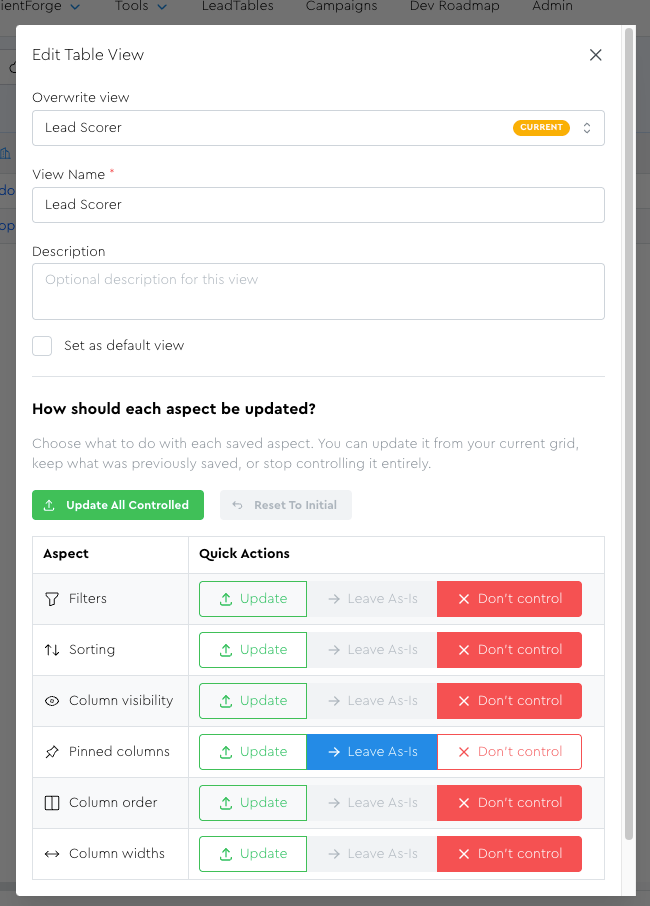
Here’s how it all works…
The “Overwrite View” Dropdown
You can choose to either overwrite your current view OR merge part of your current view into an existing one!
This can be really nifty if you want to commit some part of your current grid state to your saved views.
For example, maybe you have a saved view that you really like the column layout and pinning of, but you want to update the sorting to match your current view.
By default, this field will be pre-populated with your current view.
The “Overwrite Aspect Mapper”
This allows partial overwriting.
It’s useful in situations where maybe you messed up all your columns but really like your filters, for example.
In that case, you could choose “Update” for the filters option and leave everything else as-is:
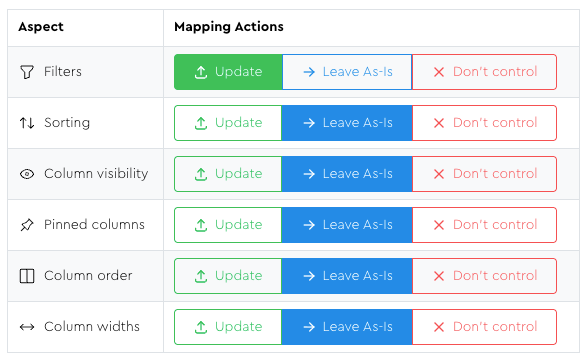
If you were to save like this, the Saved View’s filters will be wiped and replaced with your current grid state’s filters, but everything else will stay as the previously-saved state.
Controlled Vs. Uncontrolled Aspects
If you choose “Don’t Control” / you didn’t check off that aspect when creating the view, what you’re doing is essentially saying, “I don’t care about this aspect of my view and don’t want to store it.”
This means that if you apply a saved view that has uncontrolled aspects, those aspects of your currently-displayed grid state will not be affected.
Here’s an example to illustrate…
- Let’s say you save a new view and choose “don’t control” for column widths
- Then you make a column in your grid super-duper-wide
- And then you load up that saved view
- That super-wide column will stay super duper wide even after loading this view, because this view doesn’t control that.
This be useful when you want to do something like quickly apply a filter set without breaking all of your other column layout stuff.
But in general, I’ll typically save my views with everything set to “controlled.”
The “Bulk Action” Buttons
There are two bulk action buttons available:
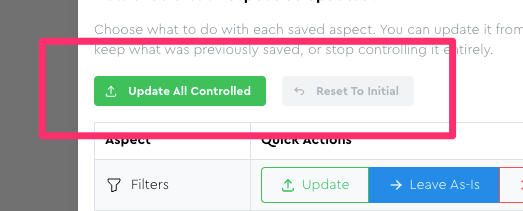
Here’s how they work:
Reset To Initial — Resets all the mappings to “Leave As-Is” / “Don’t Control” (whatever the stored state for the view is)
Update All Controlled — Basically a quick way to say “overwrite everything that’s controlled already.”
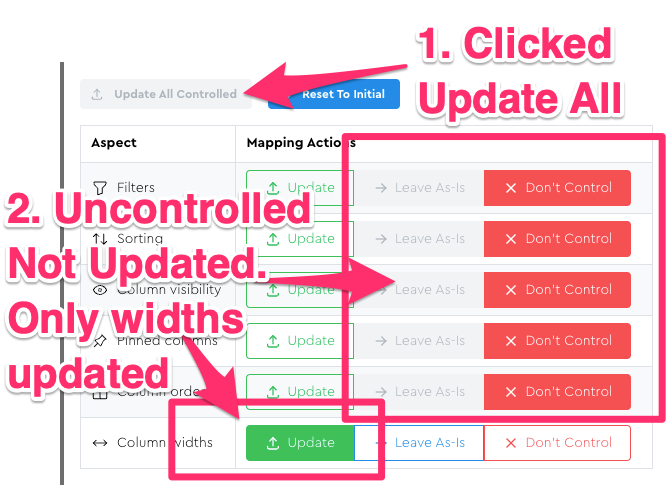
NB: If the saved view you’re overwriting isn’t controlling certain aspects, those will NOT be mapped by this button; you’ll need to manually set them to “Update” if you want to start controlling them.
Notice how in the screenshot below, only the “column widths” got changed to the green “Update” option when I clicked the bulk button, because everything else was already at “Don’t Control”:
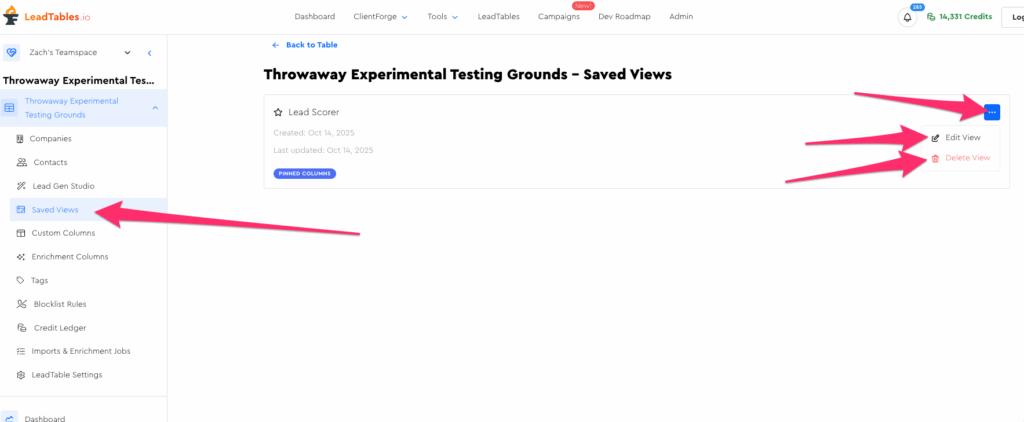
Deleting Saved Views
If you ever want to delete a Saved View, you can do that from the “Saved Views” tab of the LeadTable sidebar:
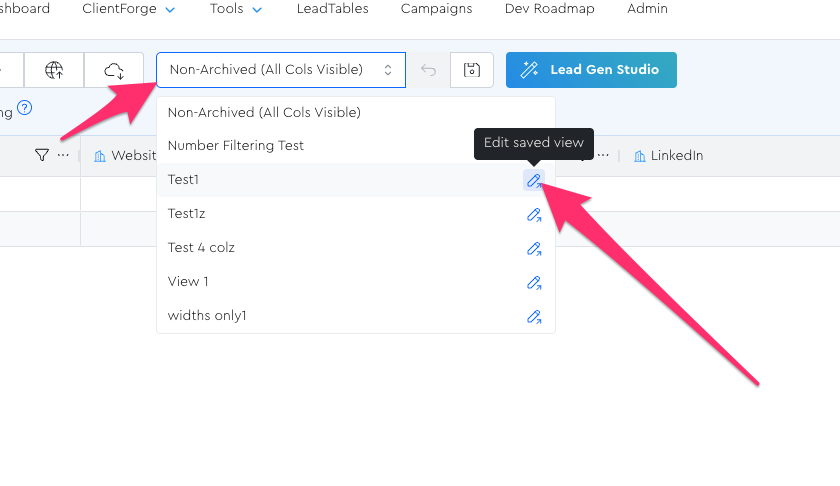
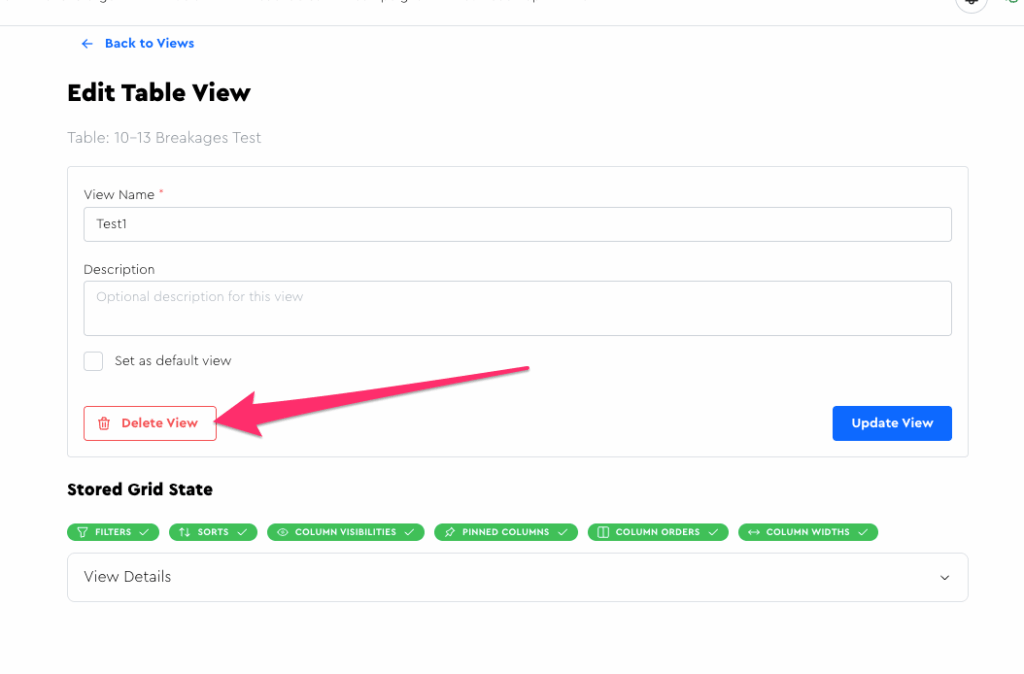
You can also navigate to the “Edit View” page from the view selector dropdown on the LeadTable:
And then delete it on there:
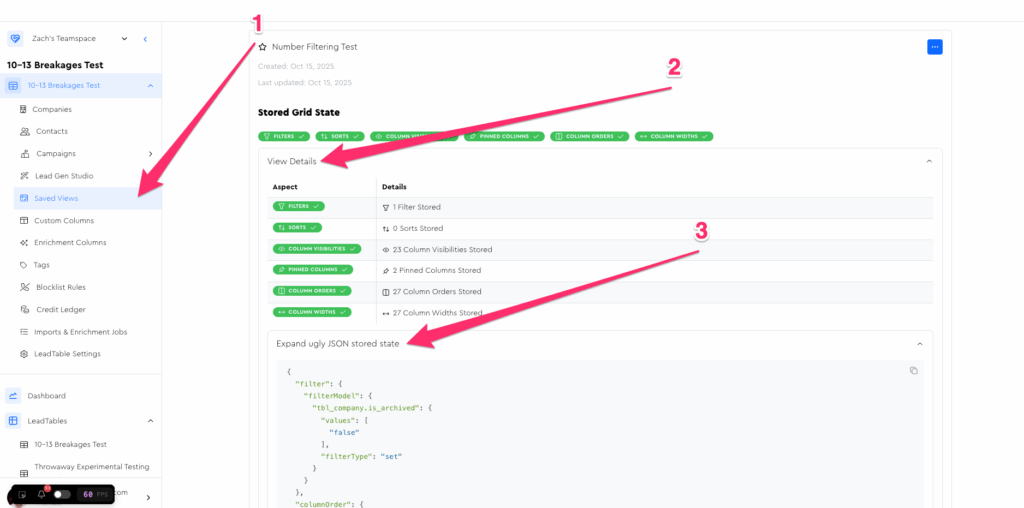
Viewing Saved View State
If you ever want to know more about what you saved into a view, you can go to the Saved Views page from the sidebar and expand the various accordions in the view to get more detail.
If you’re feeling extra spicy you can even view the ugly-ass json blob that I am literally storing for it in the database.
(But I might remove that from your UI at some point because why would you need that, yaknow?)