Running Your First LeadTables Job & Estimating Credit Costs
So, we’ve got our awesome formula created, and now it’s time to test it out.
Fortunately for you, formulas are cheap for you to run on LeadTables, so this learning exercise we’re about to do will only cost you one fiftieth of a cent 🙂
($0.0002 — At least at the time of writing. Could see myself raising the price one day tho because that’s kind of ridiculously cheap ha ha.)
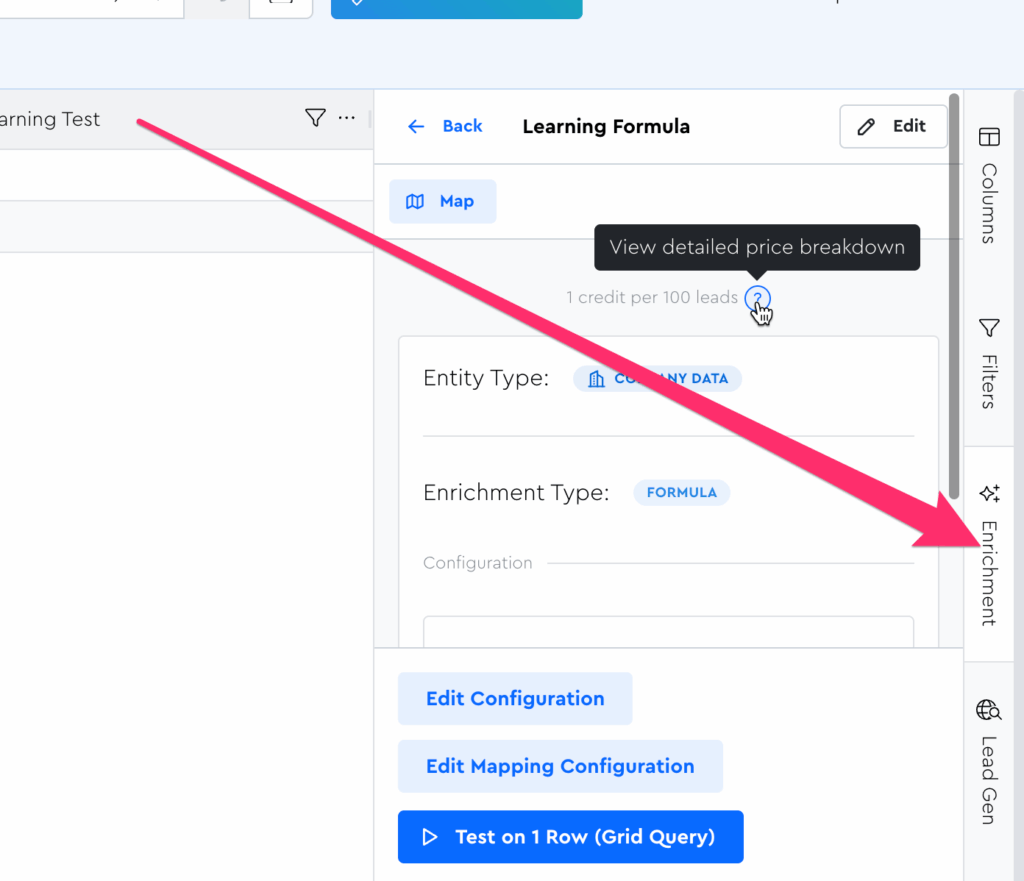
To run Data Module Operations, first click into the LeadTable, then navigate to your newly-created formula via the Enrichment Tool Panel.
If you ever want to see the detailed price breakdown for a Data Module, just browse into a Data Module and click the little question mark next to the price overview:
When you do, you’ll see a modal like this with editable fields to help you estimate what you might pay for the amount of leads you plan to run it for:
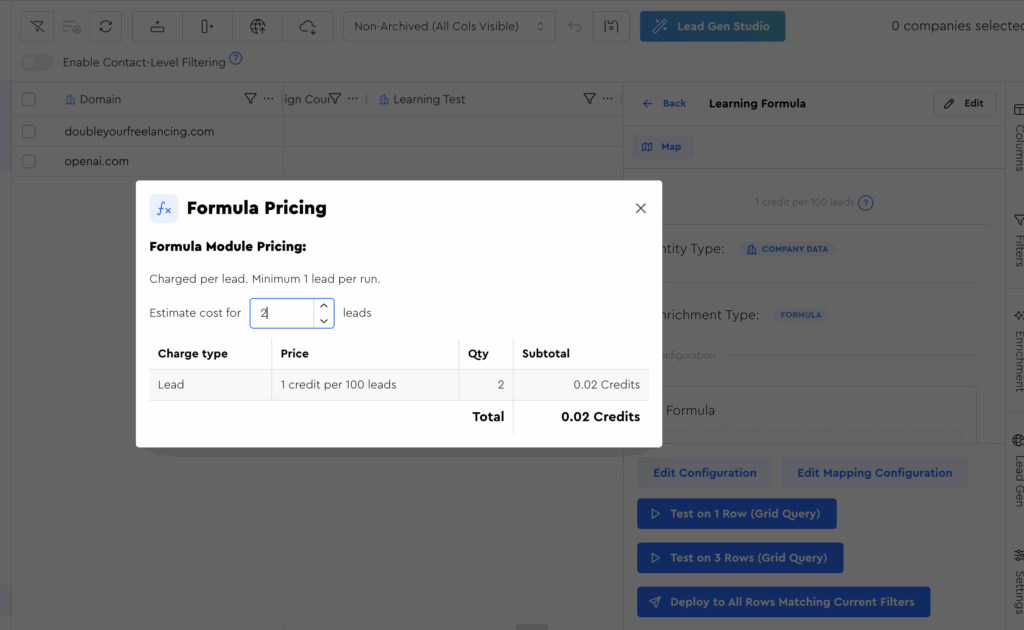
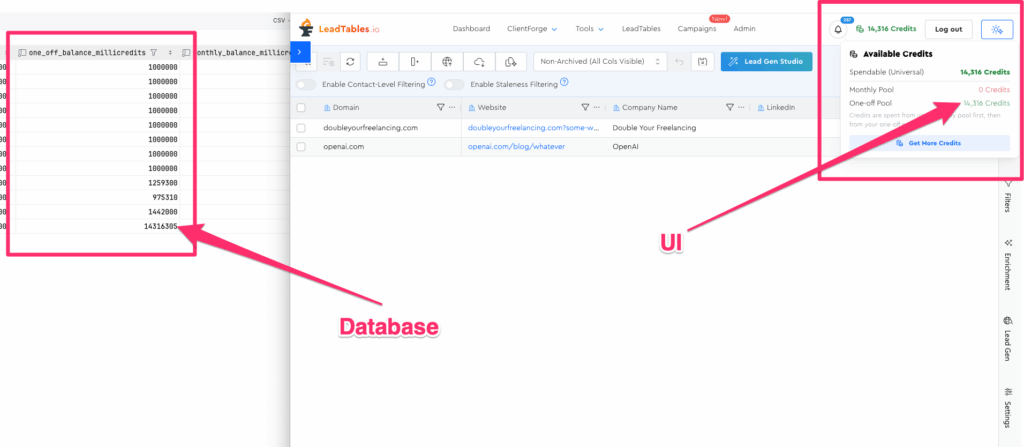
NB: Even though I display the credits in your account to you at nice friendly whole numbers, I’m storing them in my database in thousandths of a credit, so you don’t need to worry about me “rounding your purchase up to the nearest credit.” 🙂 If it says it’s going to cost 0.02 credits (aka one fiftieth of a credit), that’s all you’ll pay.
Running Your First Job / Data Module Operation
Whenever you run an operation, be it enrichment or lead gen, it’s best to test it on a few leads first.
We’ll talk later about the “1 → 3 → 10 → 30 → 100 Framework” & “Rule of 30” when testing — for now, just know that generally it’s a bad idea to fly out of the gates running Data Module Operations for everyone immediately.
Instead, it’s best to test it in small batches to make sure all looks good prior to rolling it out for everyone. Usually I start on 1, then 3, then more.
When you run an Enrichment Operation (which is what a Formula falls into) it will be executed on leads matching the filters and sorts of your current grid display.
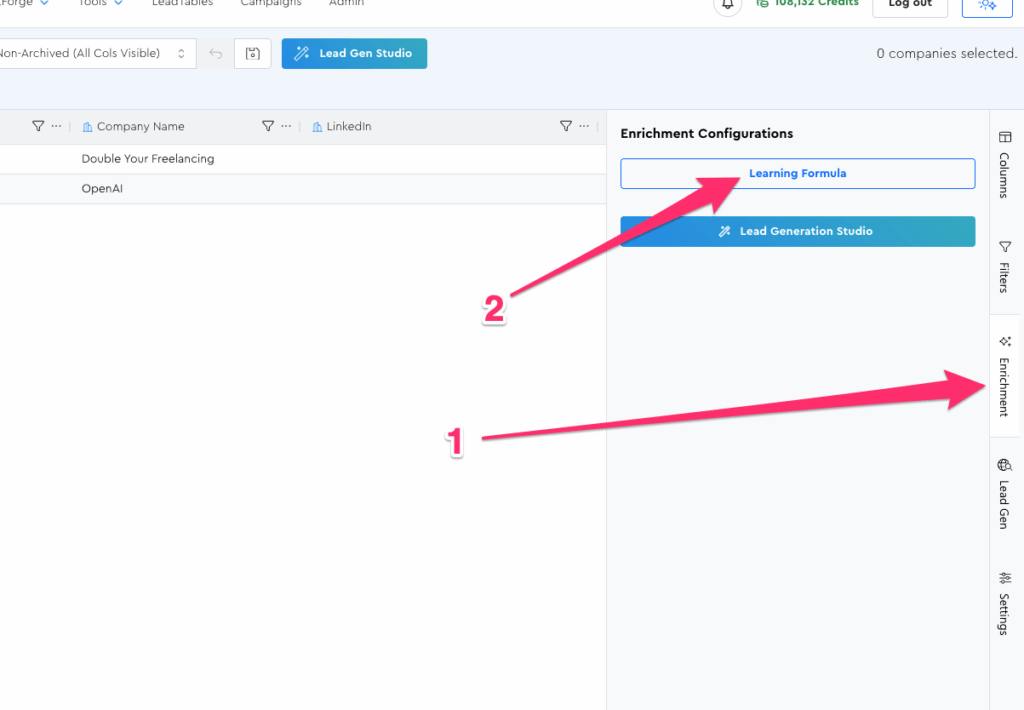
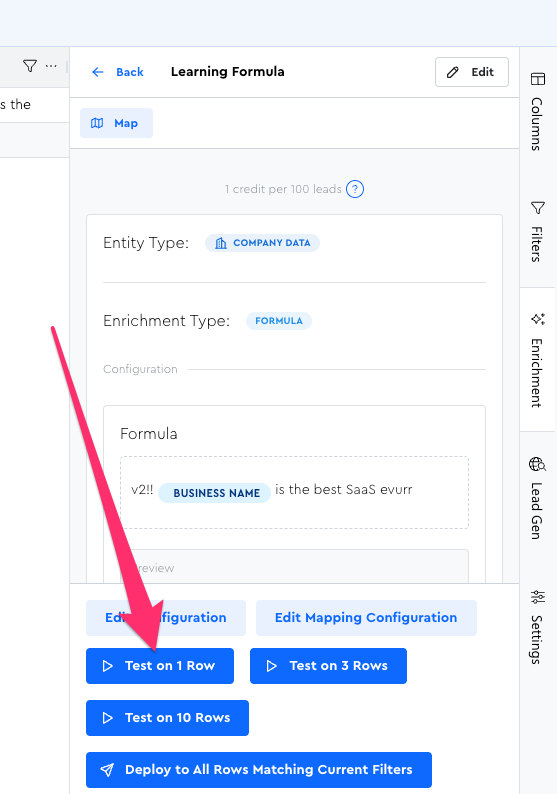
Let’s start by running it on just one lead. Open up your new formula in the Enrichment Tool Panel to get started:
Then click the “Test on 1 Row” button at the bottom:
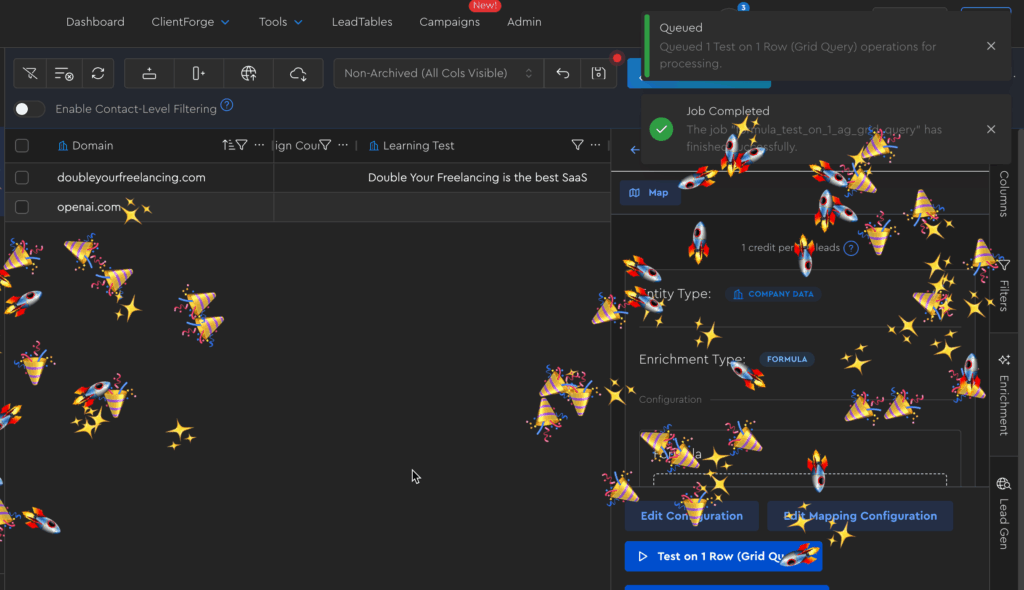
If all goes well, you should see a success notification and some fun dopamine confetti and see the resolved formula outputting in your table:
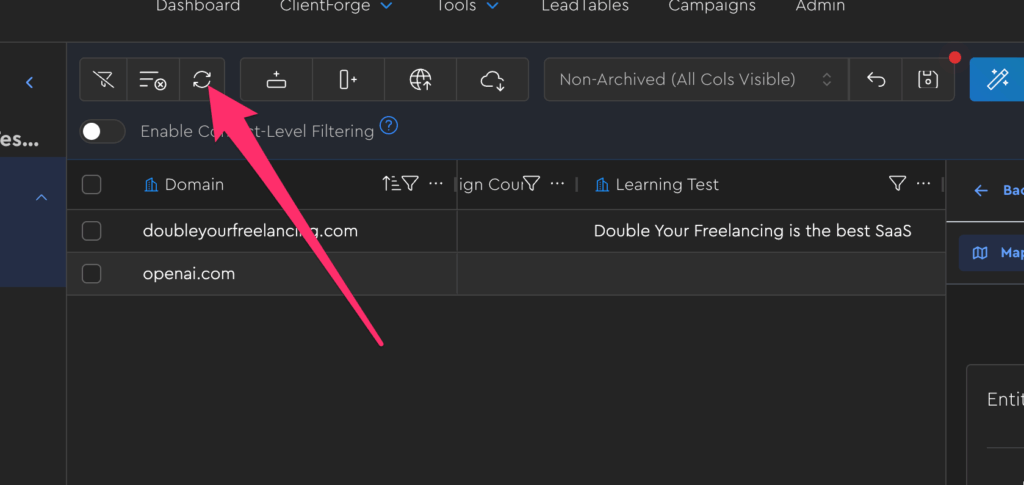
If for some reason you don’t, try clicking the refresh button:
And if still don’t, you can check the jobs page to look for errors / queue status.
(We’ll cover how to do that in an upcoming lesson.)
Running Jobs For Other Leads
An important note to keep in mind when testing is what I said earlier about Operations running for “all leads matching the grid’s current filters and sorts.”
So if you click “deploy to all” right now without changing your filters, you’ll be…
- Paying once for the lead you already enriched
- And once for the lead you haven’t yet enriched
i.e. You’ll be overpaying.
Because of this, it’s important to exclude already-enriched leads from your current grid filters prior to running enrichment jobs for all your leads.
(Or don’t, and just overpay me 😂)
Let’s practice!
In your grid filters, add a filter to the formula output column of “Blank:”

Now you’ll see just the one non-enriched lead:
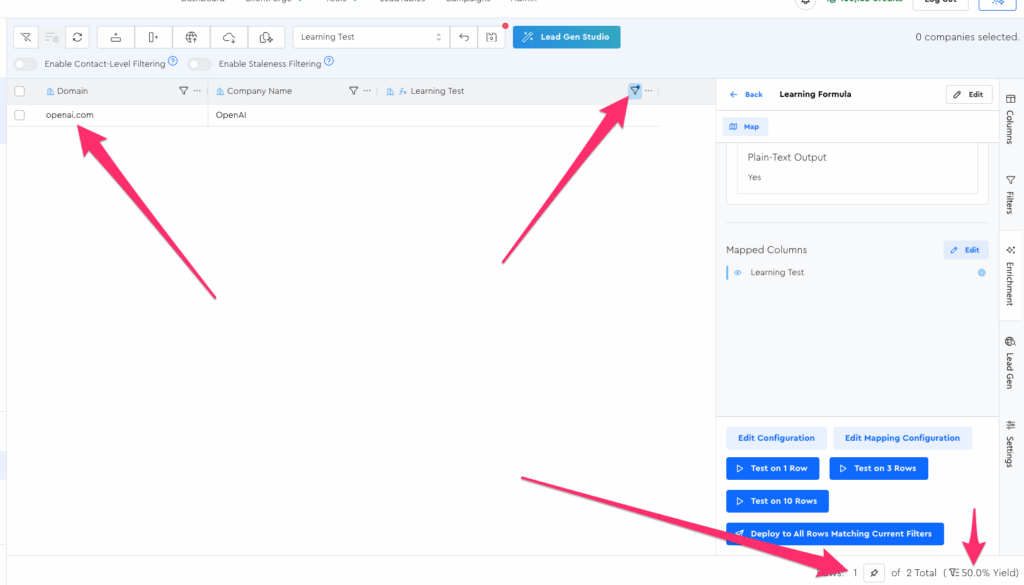
And even if you click “run on all leads” or “test on 3,” it’ll still run it on just this one matching lead.
But let’s not just take Zach’s word for it, let’s test his claims (and code)!
In your Formula config, click the “Test on 3” button:
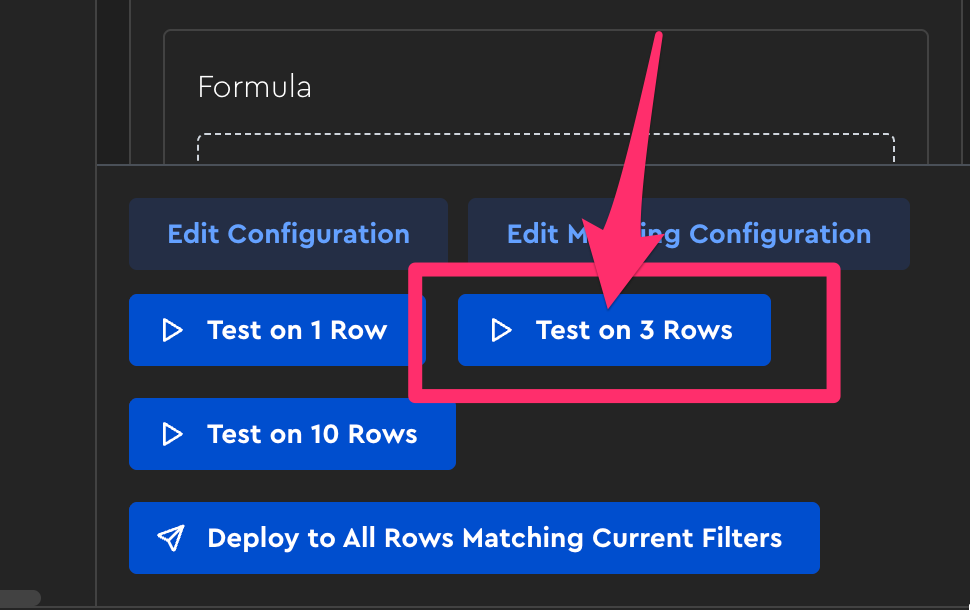
(I plan to change this UI sometime so it might look a little different)
Now, if you go into the credit ledger for this table:
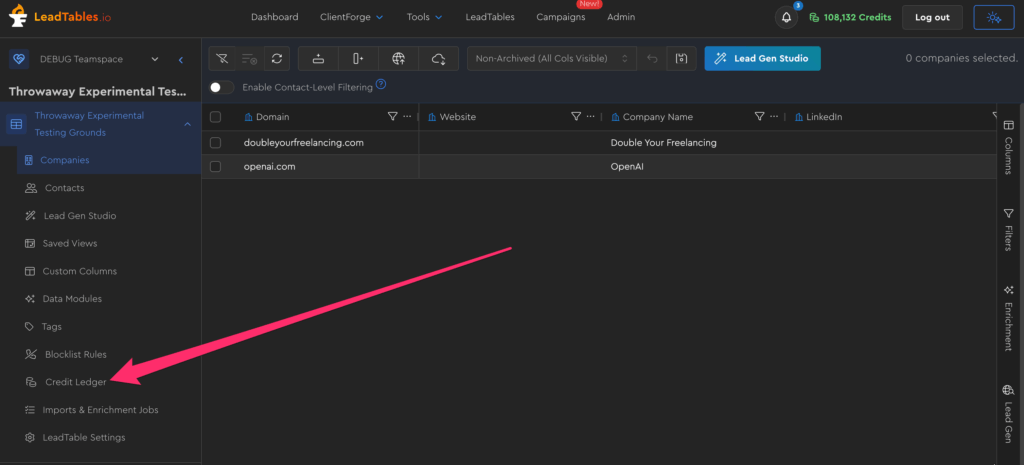
You should see that you were charged the same amount for these 2 separate options, and that even though you clicked “test on 3” (or you could have clicked “deploy to all”) you were still only charged for the 1 lead in your grid’s filters:
