How To Import Contact Leads
Now that we’ve imported our companies, it’s time to import contacts for them.
If you’ve taken a look at the example sheets we’ve been using, you’ll notice that they match the format of the “What To Do When My Source Spreadsheet Has Companies AND Contacts!?!?” lesson.
AND that they have multiple contacts per row!
So we will do 2 separate uploads to the contact tab (one for contact 1 and one for contact 2) to ensure everyone gets in there.
To start, go to the “Contacts” tab in the sidebar of your “Throwaway Experimental Testing Grounds” LeadTable. Then go to the uploader & choose “Upload Mode.”
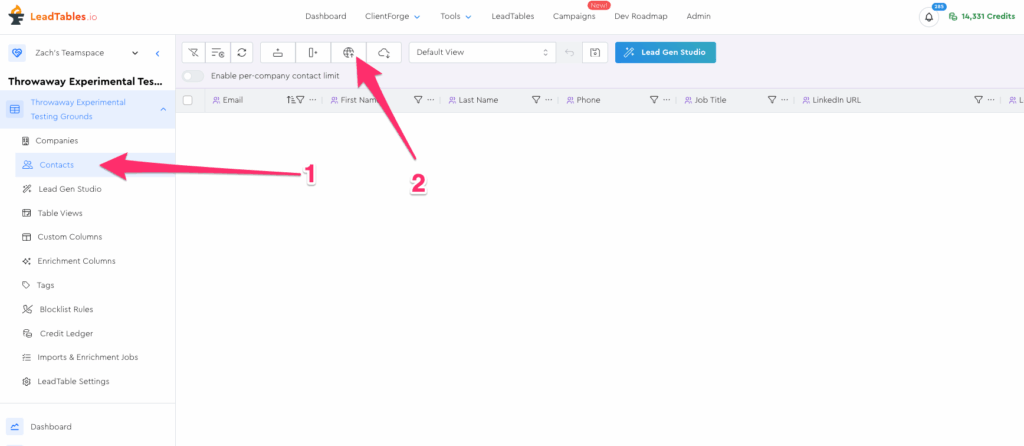
Re-upload your exact same “LeadTables_Example_Import” spreadsheet we’ve been using for this tutorial (NOT the enrichment one; the main one).
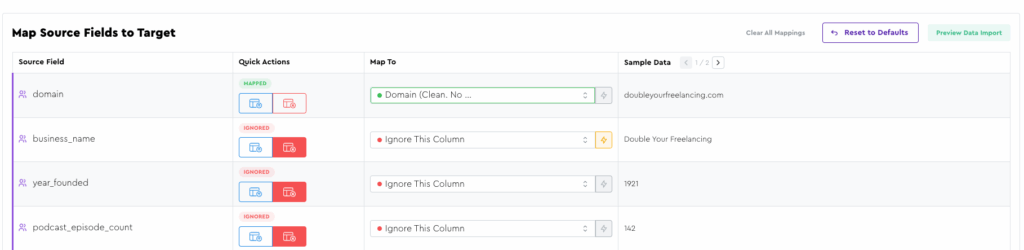
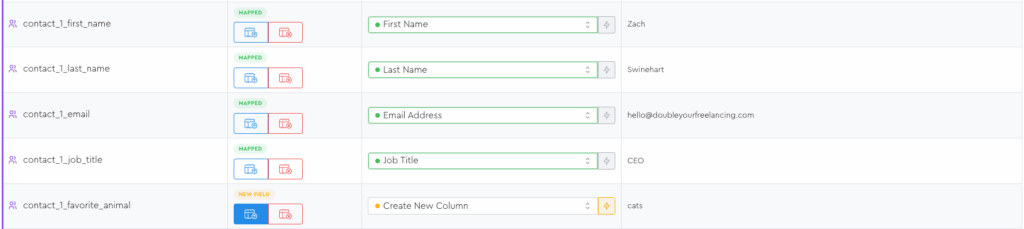
Now, map all the fields for contact 1.
My defaults were pretty good, but I’m going to unmap the business name, since the domain is a better matcher anyway, and the business name is not a contact field (it’s a company field)
Main things you want to ensure before you move on:
- 🧑🦰👍 All contact 1 fields are mapped
- The first 4 contact 1 fields are mapped to system fields rather than new custom fields
- 😺 The “Favorite Animal” field is mapped to new custom field
- 👨🦳🚫 No contact 2 fields are mapped
- 🏢🚫 All company fields except domain are unmapped
and click Upload if your field mappings look like mine:
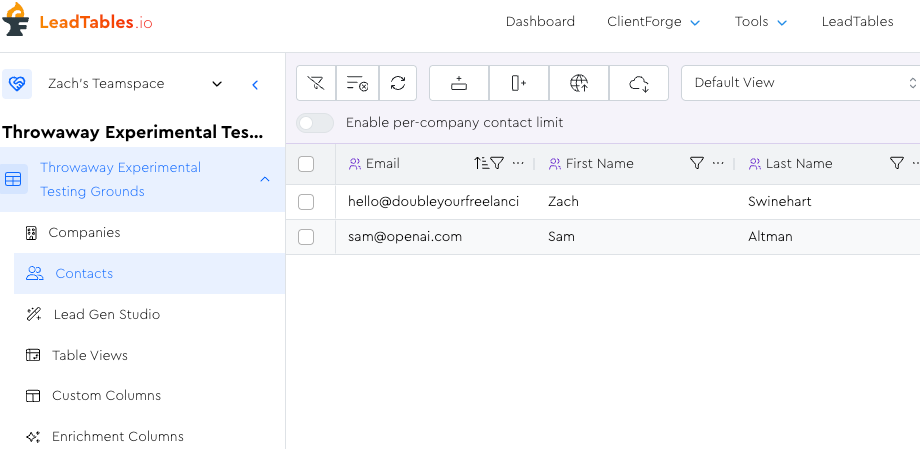
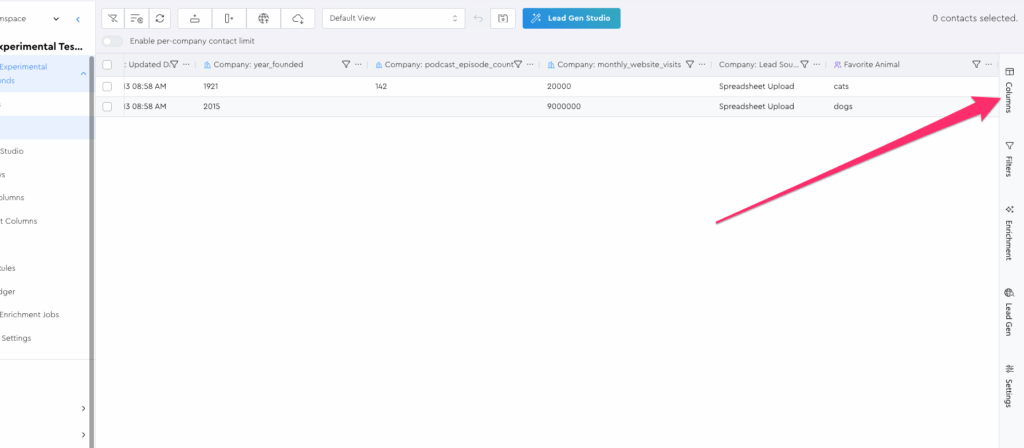
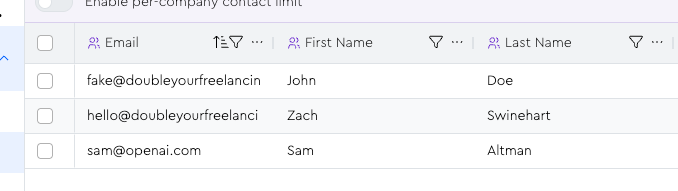
If all went well with your upload, you should see these two leads in your table:
Now we’ll do our next upload, but first, take a look at your sheet’s data.
What do you expect to happen when we do this next upload for contact 2?
I’ll tell you what I expect to happen — because I built it and know how it works 😂 — I personally expect nothing at all to happen for OpenAI (since the src sheet has only one contact for them) and then that we’ll see another row show up for Double Your Freelancing for John Doe.
So let’s get after it and see if Zach knows how his tool works!
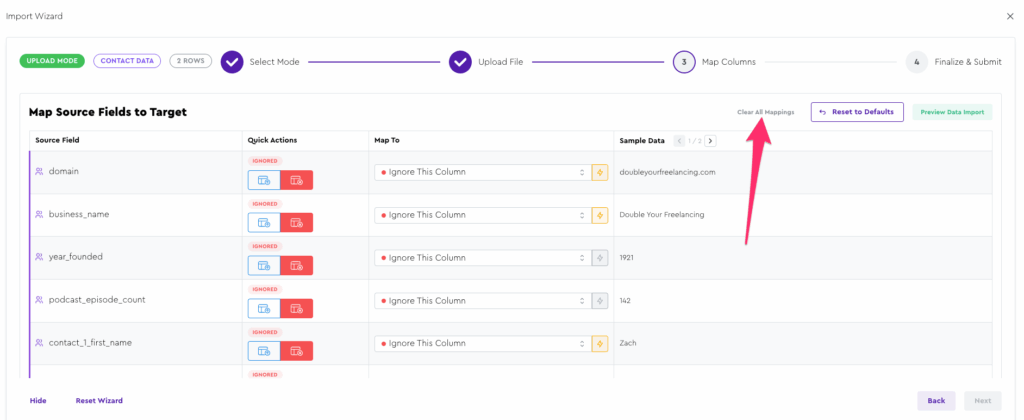
Go into the uploader again, and once again choose “upload mode” and upload the exact same sheet again (or click the “Proceed with Configuration” button for it if it’s already in the uploaded files list)
This time though, we want to click the “Clear all mappings” button since the defaults are mostly wrong:
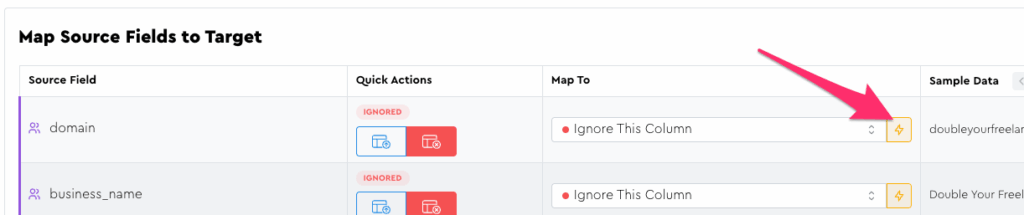
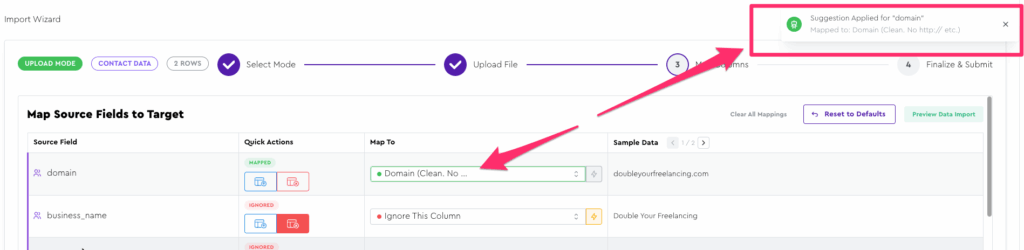
Then we can click the lightning bolt for domain to auto-map it, or just choose “Domain” from the dropdown list:
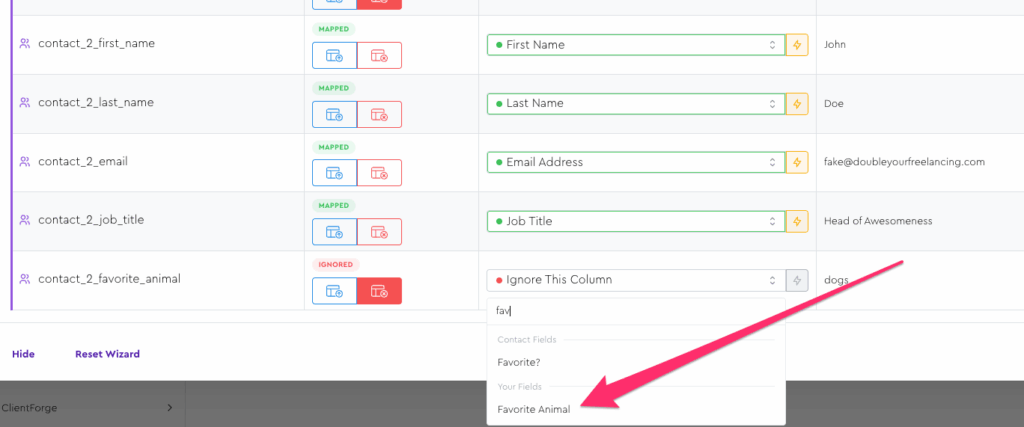
Then scroll down to the contact 2 fields and map them all properly.
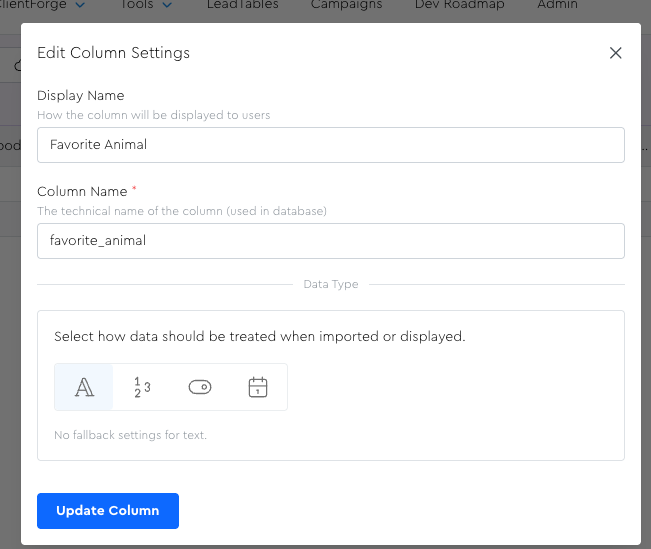
But then you realize, “oh shit! I forgot to rename ‘contact_1_favorite_animal’ to be something generic like ‘Favorite Animal’!”
No worries, I gotchu boo.
Close out of the uploader (we’ll re-do it in a minute)
Back on your main Contacts LeadTable, open the Columns tool panel:
In the tool panel’s search box, start typing “animal.” It should take you to the column.
Click the “locate in table” icon for it
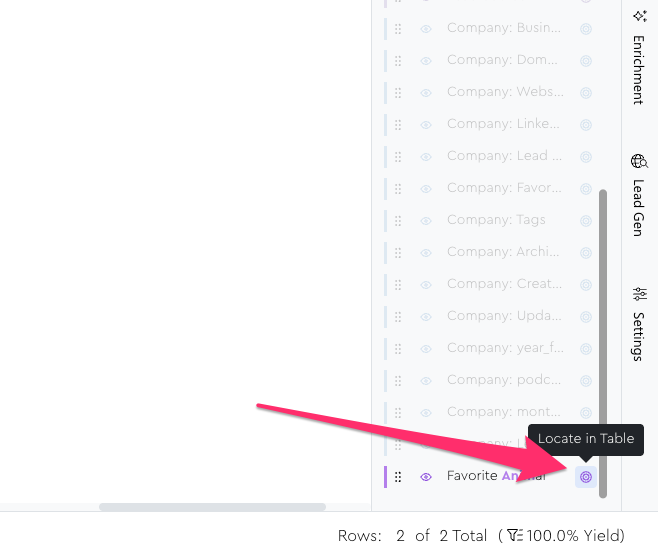
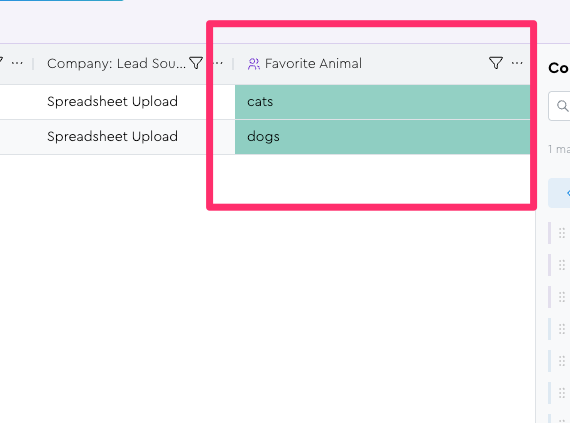
This should take you to it in the table and flash it green to help you see it:
Now click the column settings icon (or just right click the column header) to open the column menu, and click the “Edit Column Settings” option
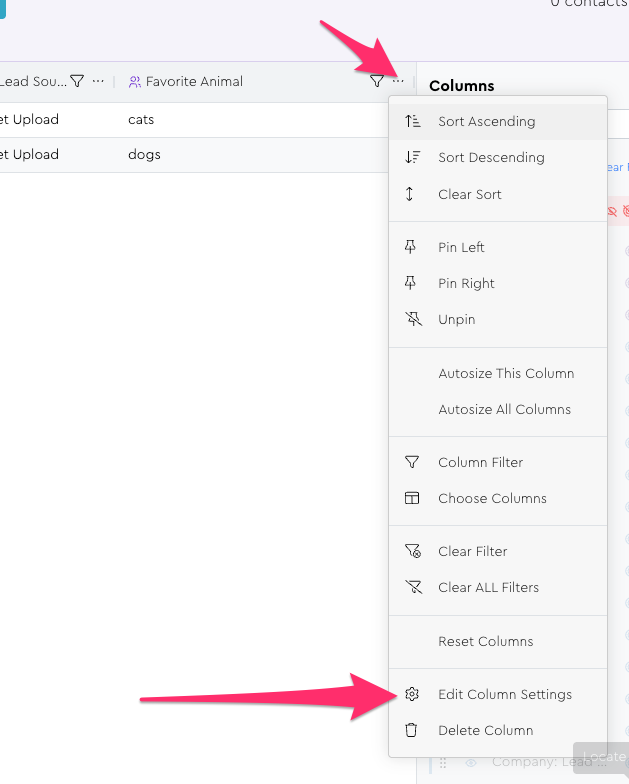
Change the Display Name and Slug to something more generic, then save
Now go back into the uploader to map contact 2, and you’ll see the new name reflected there!
So again, pull up the uploader, go to “upload mode,” use the same sheet, clear all mappings, map domain, and then map the contact 2 fields.
Now when you do, you should see the renamed column in the list:
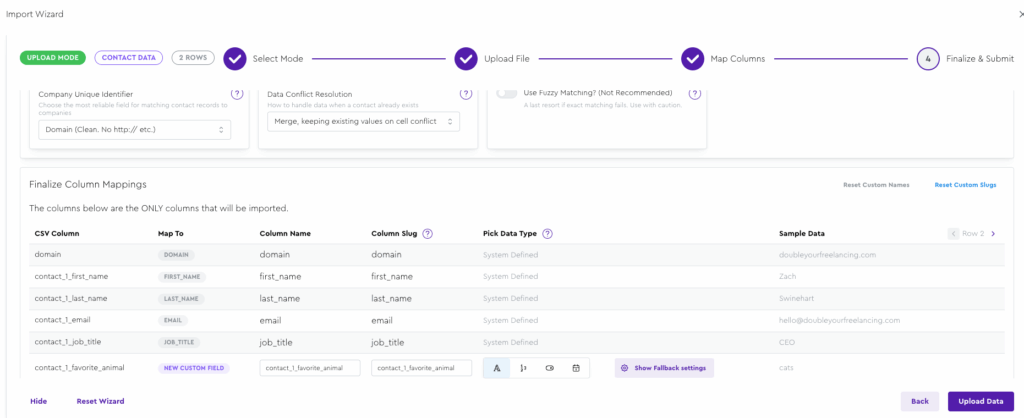
Go to the finalization step, leave everything at the default, and if your mappings look like mine, you’re good to upload:

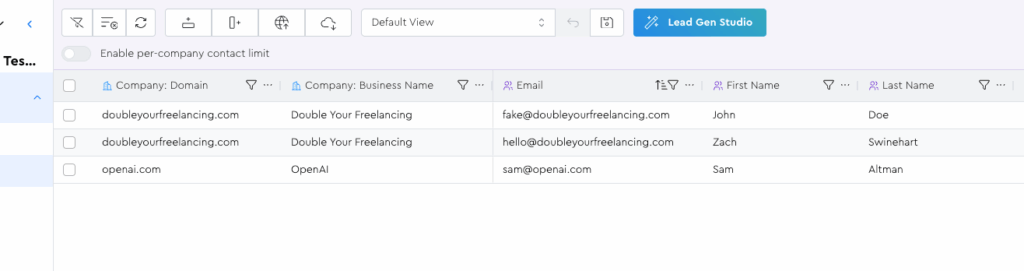
If all works well, you should now have 3 contacts in your grid:
Something I personally like to do is open the contacts tool panel, locate the domain column, and right-click it to pin it left. (Maybe do the same for the Business Name column too) This helps you appreciate the relationships you just created:
We’ll talk more about working with columns in an upcoming module. For now, you can solidify your knowledge by browsing around the grid and looking at the info we imported.