How The Import Column Mapper Works
In the last lesson, we uploaded our test sheet and were taken to the column mapper page of the uploader:
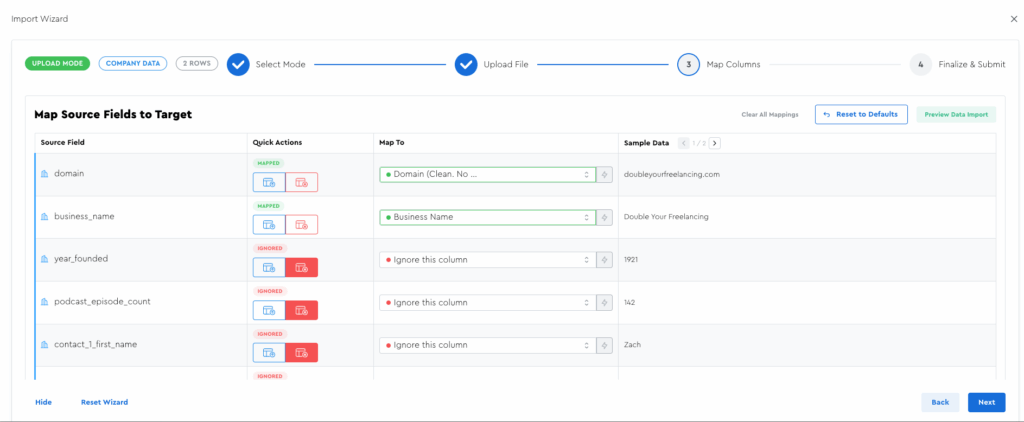
Let’s now talk about how this page works!
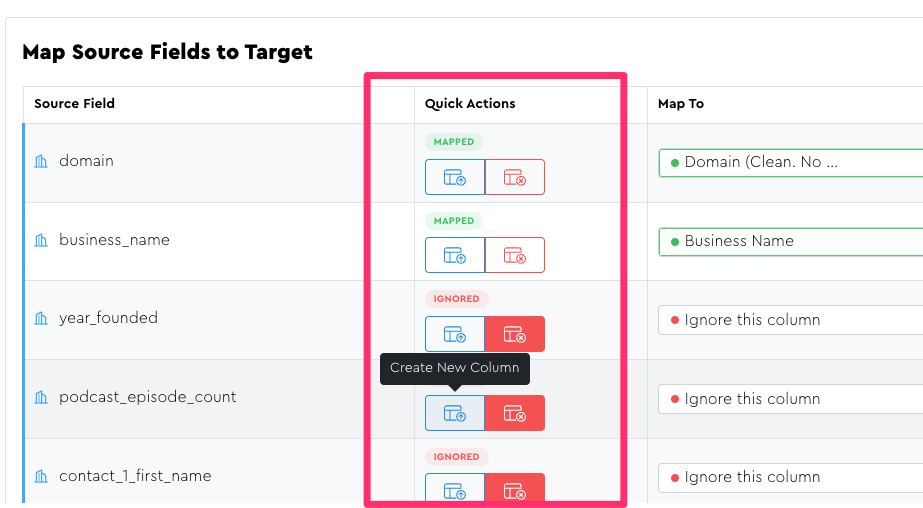
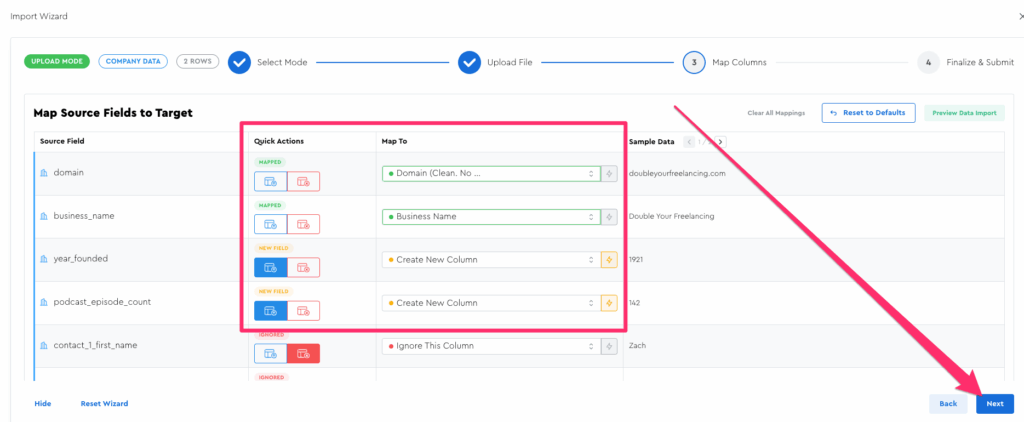
Quick Actions
At the time of writing, there are 2 quick actions, and you can hover over each to see the tooltip of what they are:
(Side note, I often use icons in LeadTables for things like this, and when I do, I try to always include a tooltip when it’s not obvious what they do)
The options are:
- “Create New Column” — Will create a fresh column for this data in the table
- “Ignore” — The column and its data will not be imported
You can also map data to pre-existing fields.
Manually Mapping To a Pre-Existing Field
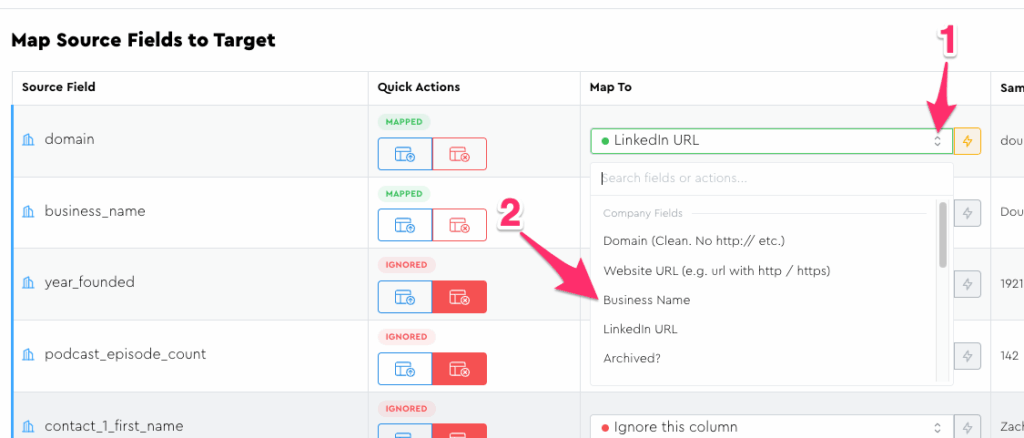
When you first load up the mappings page, LeadTables will try to guess at what the mappings should be. There’s also a lightning bolt icon next to fields that does the same thing. (It’ll be yellow and clickable if a suggestion is available that you haven’t already selected)
The auto-suggestion feature is nifty when it works, but it often doesn’t.
And ultimately all it’s doing is looking through the “Map to Field” dropdown to look for a similar field name to your uploaded spreadsheet:

(I’ll one day probably add some AI or something to make it “smarter” but for now it’s pretty basic.)
As a fun experiment, try mapping domain to the “LinkedIn URL” option, then clicking the lightning bolt to see it auto-mapped back.
Mapping Uniqueness
A given column in your LeadTable can only get one mapping from your uploaded spreadsheet.
If you try to map two columns from your upload to one column in your LeadTable, the first one will get un-mapped when you set the second one.
To see this in action, try mapping your “domain” upload column to the “Business Name” LeadTable column:
You should see an error message telling you Business Name was unmapped, and see that column indeed unmapped in the list:
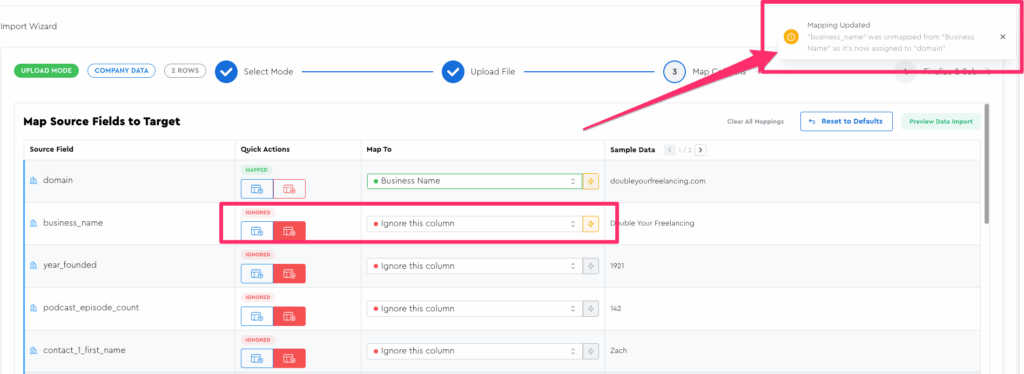
You’ll also notice that the lightning bolt next to “Business Name” became yellow again, because the auto-mapper sees it as different than what it thought you’d want. You could click that lightning bolt to reset it back if you wanted to, which will then unmap Busines Name from Domain.
Bulk Actions
Now that we’ve truly messed up all our mappings, this seems like a great time to talk about “Bulk Actions.”
At the top right of the page, you’ll see the bulk actions:
- Clear all
- Reset to recommended
- Preview data import
Let’s click the “Reset to defaults” one.
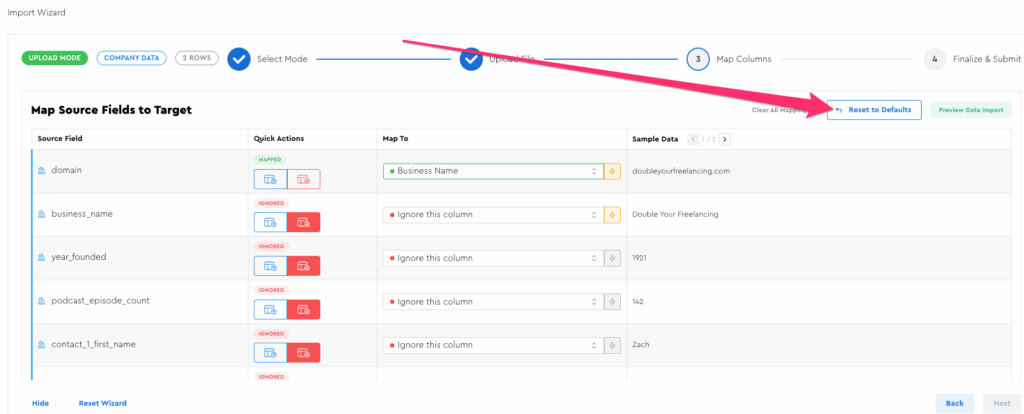
You should now see the mappings all back to what they were when you opened the wizard, with all lightning bolts grayed out:
The “Clear all” one does exactly what it sounds like: it sets all fields to “ignore.” This is useful when enriching data from an upload with a ton of columns where you want to be careful to only upload data you care about.
NB: You’ll notice there’s not a “map all to new columns” option — this is intentional design because:
- A: Your LeadTables do have limits to the amount of columns you can create
- B: More columns = more clutter and slower table load speeds
So while you should never skip over data you think you’ll use, I also don’t want you willy-nilly adding useless crap you’ll never use, because that sets you up for overwhelm later 🙂
NB: Keep in mind that LeadTables has a very powerful “auto-data-merger” when uploading in “enrichment mode,” which we’ll cover in a future lesson, so you don’t have to make “forever-commitments” about what data you want right now; you can always import more columns from the same spreadsheet later and automatically merge them into the records you’re importing right now.
Sample Data
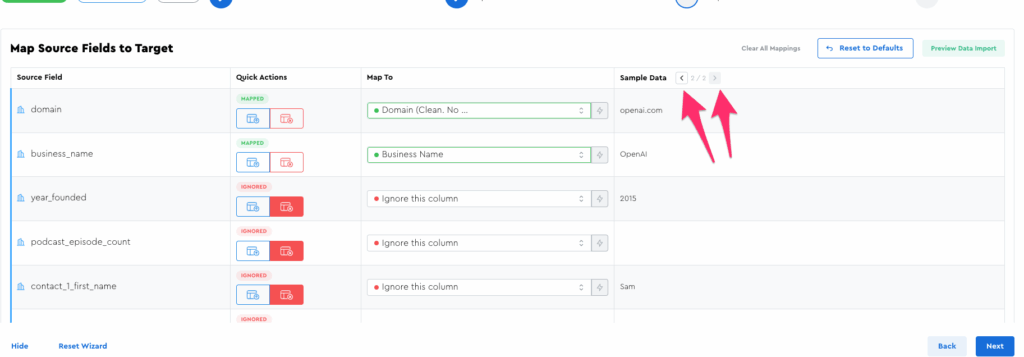
As you’re mapping your columns, it can be helpful to see what kind of data they hold for deciding whether or not you want to map them.
There are two ways for you to browse this data:
1 — The sample data back/next buttons
You can click these buttons to navigate back and forth:
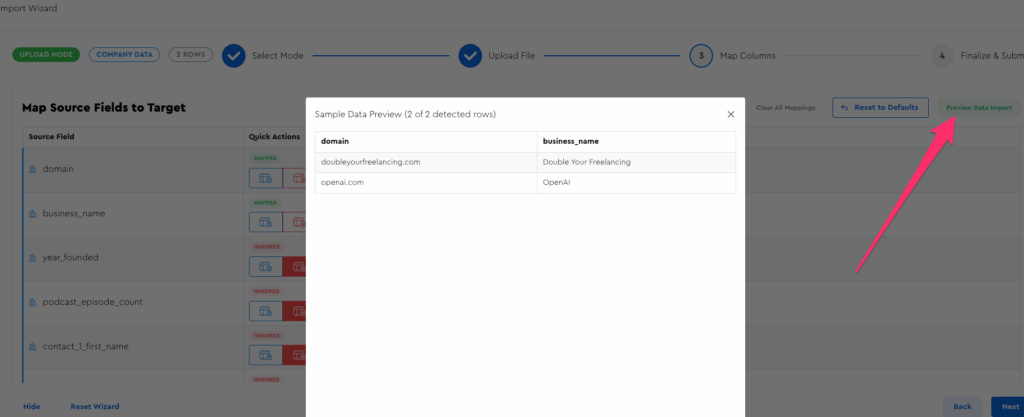
2 — The preview popup
If you want to see a table-like preview of what you’re importing, you can click the “Preview data import” button.
Note that it only shows columns that are not set to “ignore.”
Next Steps…
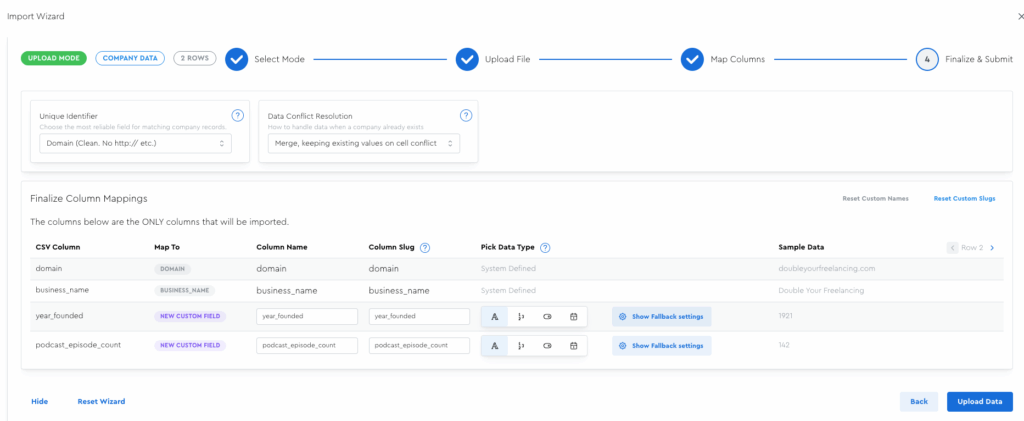
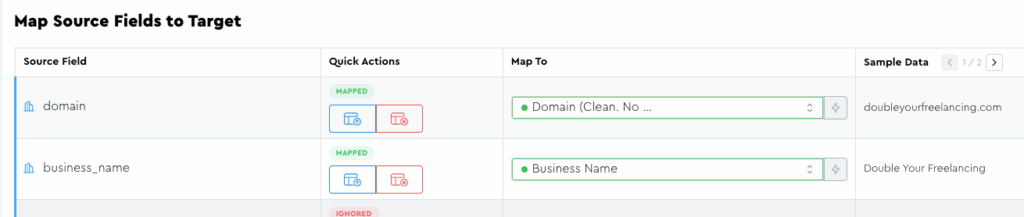
For now, create the following mapping setup, then click the “Next” button at the bottom right, and we’ll pick up there in the next step:
- Domain — 🟢 map to system field domain
- Business Name — 🟢 map to system field Business Name
- year_founded — 🟡 Create New Column
- podcast_episode_count — 🟡 Create New Column
That’ll take you to the “Finalize Column Mappings” wizard step, which is where I’ll meet you in the next lesson.