How To Configure Your Campaign’s Funnel Structure
Everyone’s funnel is a bit different. Some LeadTables users will have complex funnels with multiple offers, others will be quite simple.
Fortunately for you, LeadTables offers flexible funnel structure options!
Let’s edit the “Initial Cat Owners Campaign” to explore how they work.
Once you’re editing that campaign, go to the “Funnel Config” tab and you should see something roughly like this:
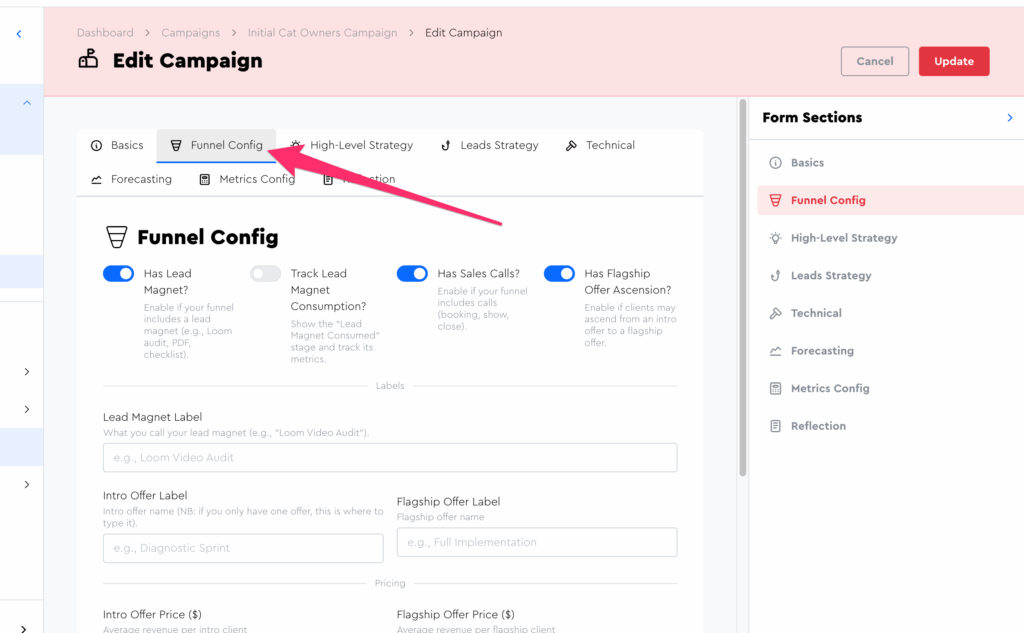
(I’ll be changing the fields over time so yours might look a little different)
The default toggle options at the top reflect what I’d consider to be the “standard cold outreach funnel for freelancers and agencies,” which looks like: Cold Email → Lead Magnet → Sales Call → Close for Intro Offer → Ascend for Flagship Offer.
What The Funnel Config Toggles Do
The funnel config toggles affect what metric data you’ll be able to load into this campaign, as well as what displays on the metrics page.
For example, if you did a “spam funnel” like this…
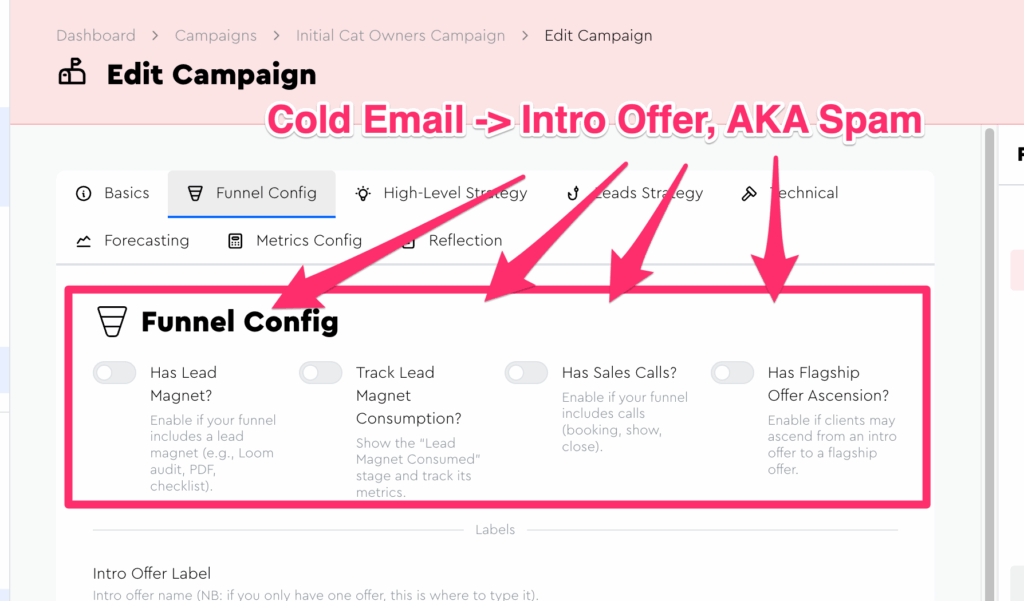
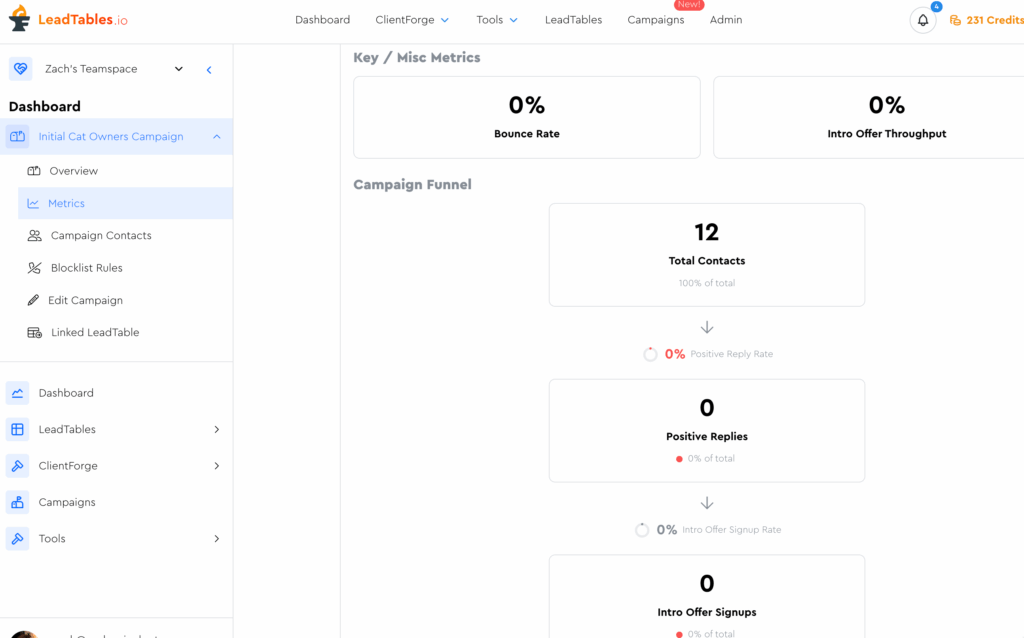
…Your metrics page would look very bare-bones:
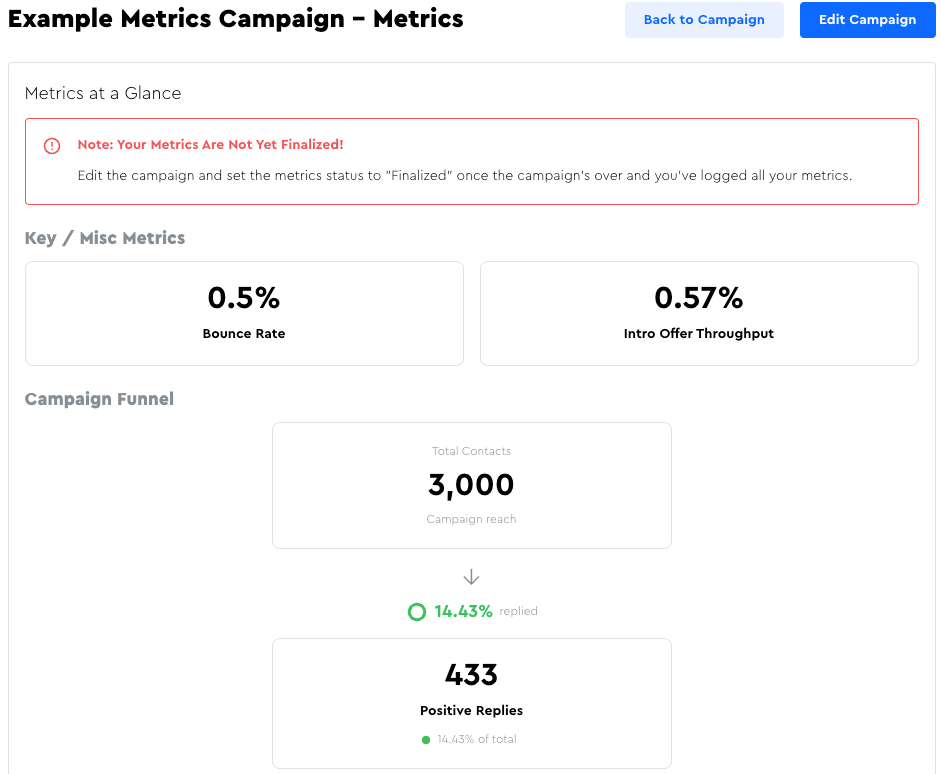
Whereas if you configured it with all of them enabled, it’d look like the example from a previous lesson, with all stages visible:


What To Do When You Only Have 1 Offer
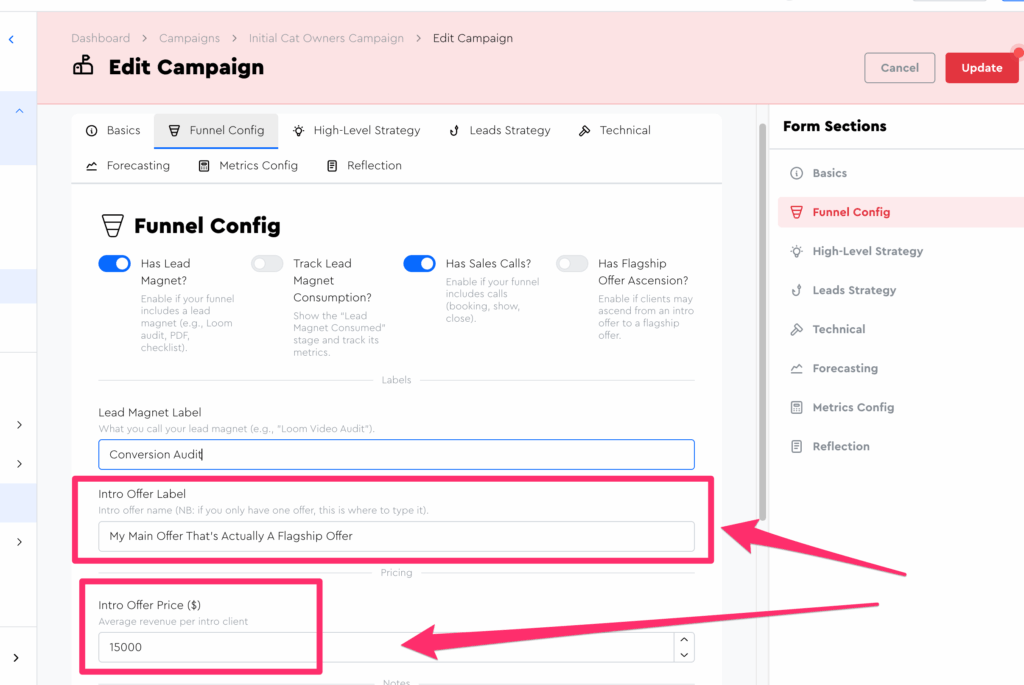
If you don’t have an “offer ladder,” you’ll want to disable the Flagship Offer Ascension toggle.
I know, it’s a bit weird calling your only offer an “Introductory Offer,” but for the way the app is built, that’s how it works.
What you can do to help yourself remember is fill out the offer label field:
I don’t have those labels displaying in the metrics UI as of the time of writing, but I’ll add them eventually when I come back for Campaigns Mk. 2.
What To Do If You Deliver Your Lead Magnet Live
If you deliver your lead magnet live, e.g. a free live strategy session, you can enable the “track lead magnet consumption” toggle to allow show rate tracking for the lead magnet call.
When tracking your metrics (which we cover in an upcoming lesson) you’d do…
- Lead Magnet Call Booked → Log as “Lead Magnet Requested”
- Lead Magnet Call Showed → Log as “Lead Magnet Consumed”
This will allow you to separately track your show rate + set rate for your “initial lead magnet call” from your main sales call booking/show rate metrics (Assuming you have two separate calls; one for the lead magnet and a separate one to close.)
NB: If you deliver your lead magnet on the same call as you close for the intro offer, you’d want to either disable lead magnet features and track as sales calls, or disable the sales calls and track and lead magnets — up to you which way you want to go.
Both will compile metrics effectively the same way, so it’s just about whatever you’ll best remember / most intuitively understand when you see the funnel metrics conversion flow rendered on the metrics page
(And what you’d want them showing up as when comparing this campaign to others you might run with different lead magnets etc. in the future.)
What The Offer Prices Are Used For
The offer prices are used for displaying things like your profitability, “revenue to client acquisition cost ratio,” etc.
If you have a recurring-billing offer as your flagship offer, it would probably be wise to enter the “price” in as your LTV (Lifetime Value) so that you can get an estimate of eventual revenue that will be generated from these leads that closed.
At the time of writing, I’m not yet displaying those (they’re only in the forecaster tab for now) but I know I will eventually, so you might as well get in the habit of logging them. 🙂