How “Repeater” Fields Work In LeadTables
Where we left off, we got the basics of our prompt configured and we now need to set up the output fields.
Before we can do that, you need to understand how “repeater” fields work in LeadTables, because they’re very powerful and I have them built in to several different Data Modules.
What Is A “Repeater Field?”
Basically, a “repeater field” allows you to have data modules that can output many different fields (however many you want!), which you can then map to respective columns in your LeadTable. (Wow!)
So in our case, if we’re wanting to ultimately sell our tick spray to these leads, we might want the AI to do a few types of output for us:
- Tick Spray Sample Worthiness Score — how likely they are to be worthy of a free tick spray sample based on their pet type, so we don’t send tick spray samples to dolphin owners who are never going to become customers because dolphins don’t get ticks.
- “Gain-Based Hook Seed” — what kind of gain-driven angle might resonate for them based on their pet type. Not sure that I’d do this IRL, but good for the practice exercise.
- “Fear-Based Hook Seed” — what kind of fear-driven angle might resonate for them based on their pet type. Not sure that I’d do this IRL, but good for the practice exercise.
If we got that data from this module, and had a solid enough prompt + model choice that our output was reliable and good, we would have a lot of epic “personalization seeds” that we could use later when writing our cold email lines.
BTW, this kind of “multi-out” situation is why repeater fields are so freaking NIFTY.
If you were to try to get those 3 types of output above through a typical Make/n8n automation that dumps into a google sheet, you’d typically ask the AI to give you a response in JSON format, which you then try — and often fail — to parse, to then map into your google sheet or whatever. It’s flaky and often fails, and can be quite frustrating to run and maintain.
But with LeadTables, I have a very sophisticated instruction + parsing setup behind the scenes with a lot of rules and fallback parsers to take all of that complexity off your plate, so that all you need to do is specify what you want and it’ll just work.
Here’s how repeaters work…
How Repeaters Work in LeadTables
There are a few ways to tell if a field is part of a repeater.
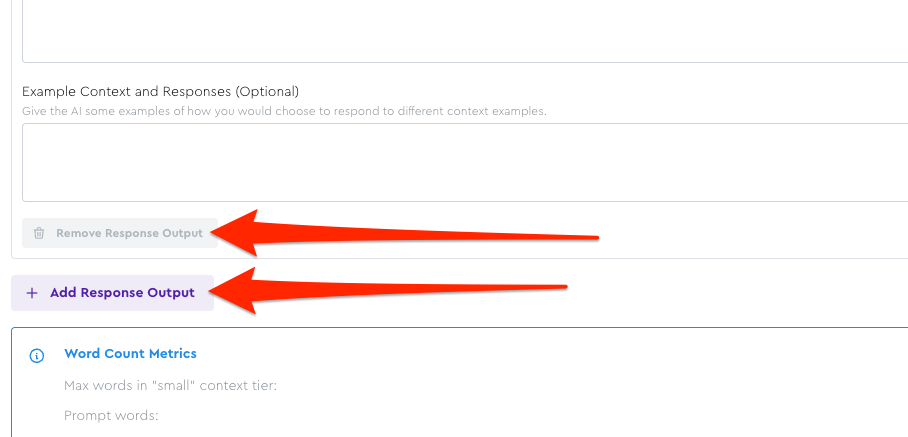
The first clues are a border around a set of fields, or a “title + up/down arrow” set like this:

But the definitive way to know for sure is to just scroll down. If you see buttons to add/remove, you know it’s a repeater field.
Let’s Configure Our Output Fields
So let’s configure our repeater fields to understand how they work!
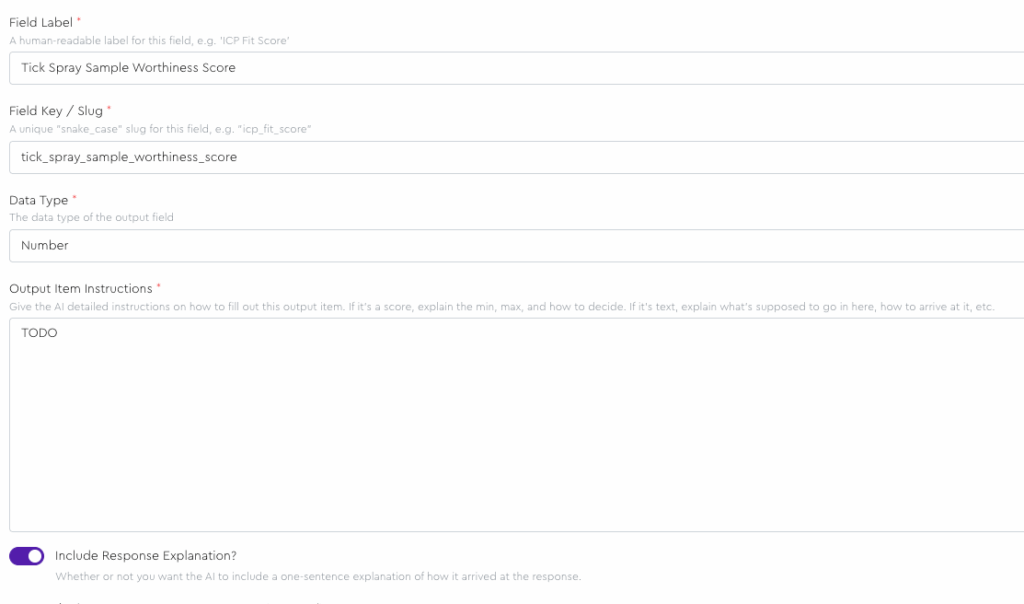
Configure the first repeater item like this…
- Field Label: Tick Spray Sample Worthiness Score
- Field Slug: tick_spray_sample_worthiness_score
- Data Type: Number
- Output Item Instructions: Just write “TODO” for now
- Include Response Explanation: ✅ Toggled on
- Optional fields left blank
Now scroll down and click the “Add Response Output” button:
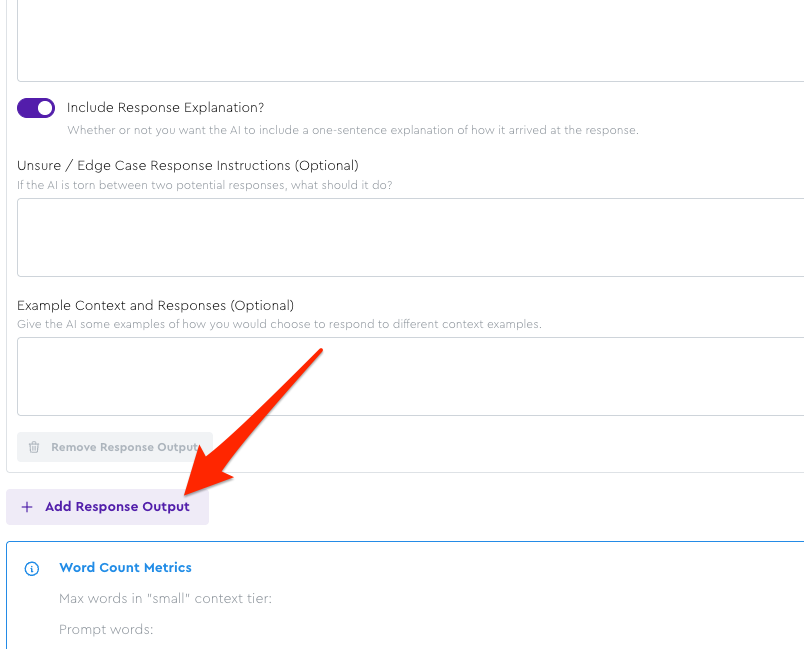
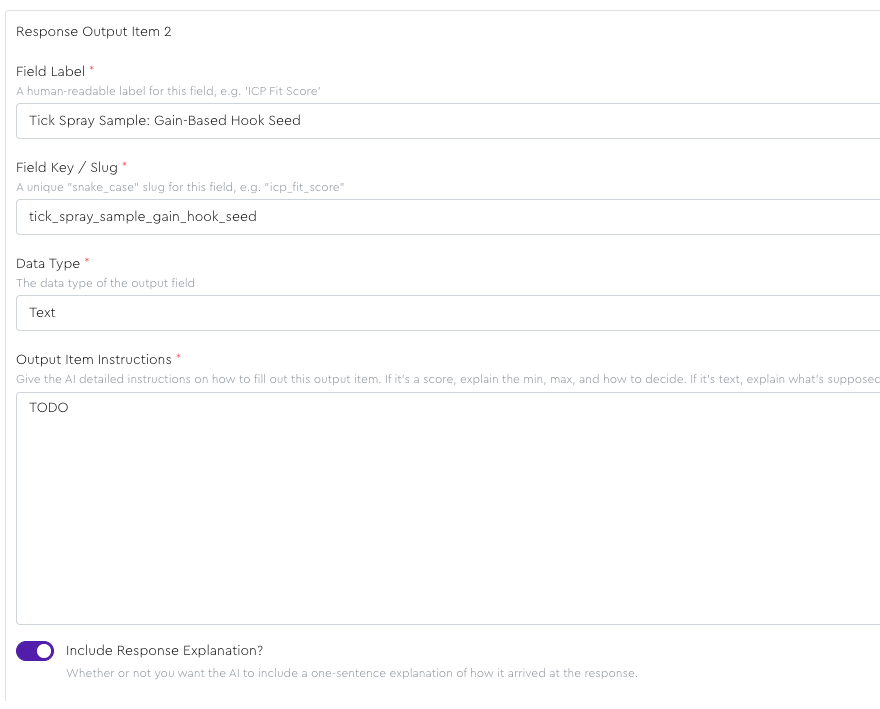
You should see a new empty field added. Let’s configure this one to…
- Field Label: Tick Spray Sample: Gain-Based Hook Seed
- Field Slug: tick_spray_sample_gain_hook_seed
- Data Type: Text
- Output Item Instructions: Just write “TODO” for now
- Include Response Explanation: ✅ Toggled on
- Optional fields left blank
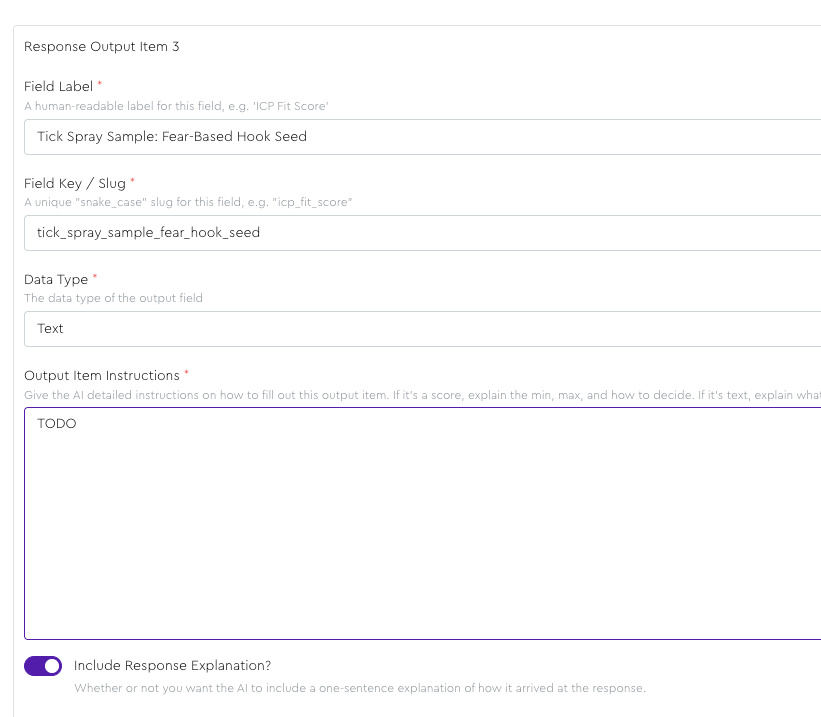
Then finally, let’s add a third one for the fear-based hook seed with this config:
- Field Label: Tick Spray Sample: Fear-Based Hook Seed
- Field Slug: tick_spray_sample_fear_hook_seed
- Data Type: Text
- Output Item Instructions: Just write “TODO” for now
- Include Response Explanation: ✅ Toggled on
- Optional fields left blank
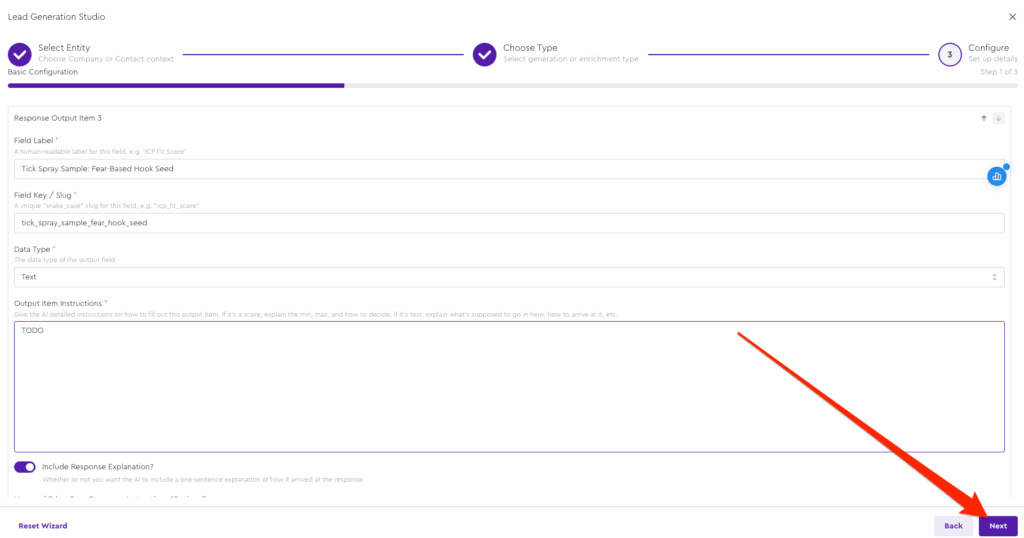
Then, let’s click the “Next” button to go to the mapping phase to get this mapped and saved; then we can finalize our prompts once it’s saved to ensure we don’t lose work if something goes wrong in LeadTables/your browser/if your cat walks on your keyboard:
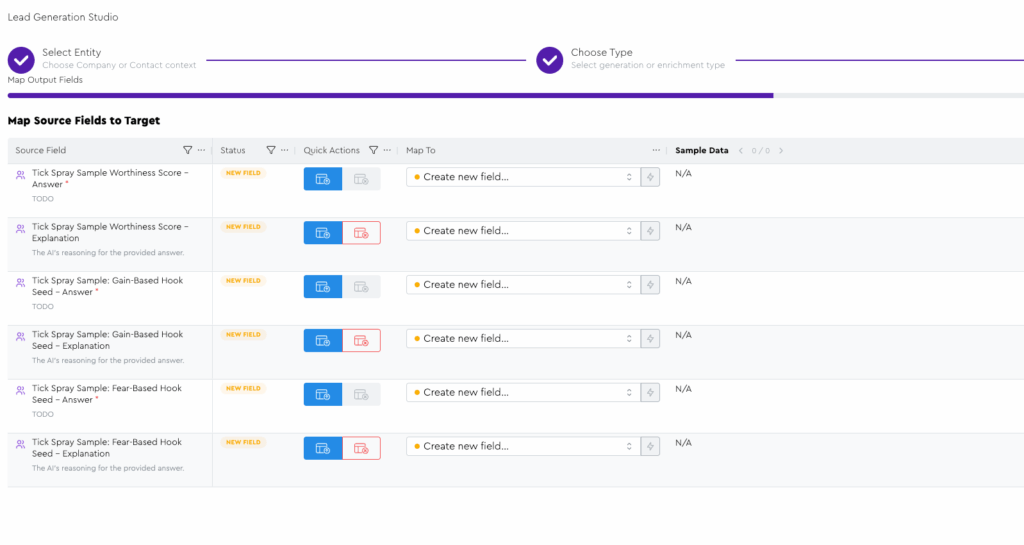
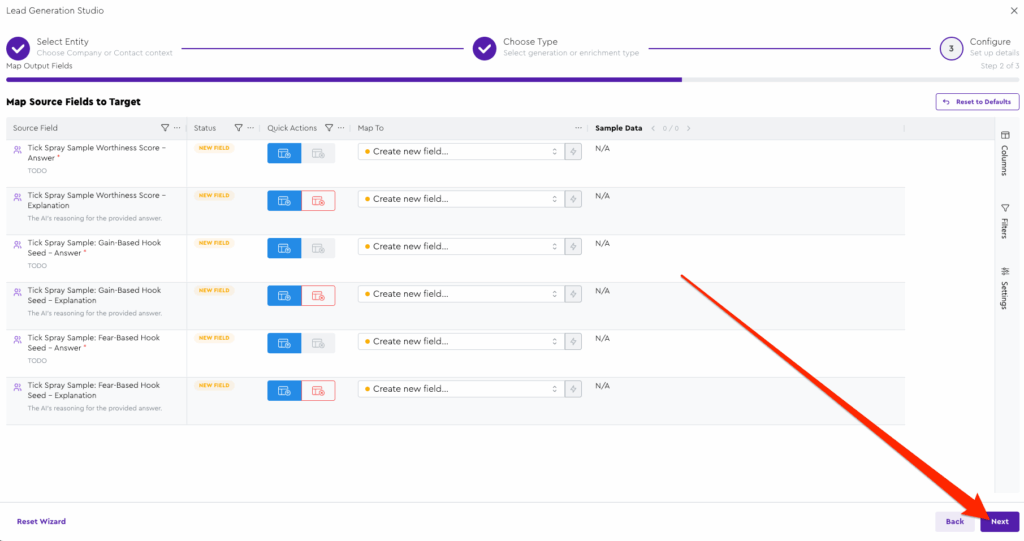
On your mapping page, you should see 6 output fields, like this:
And fun fact, if you’d toggled off the “Include Response Explanation” toggle for some, like your “gain/fear hooks,” for example, those response explanation fields would NOT show up here. e.g…
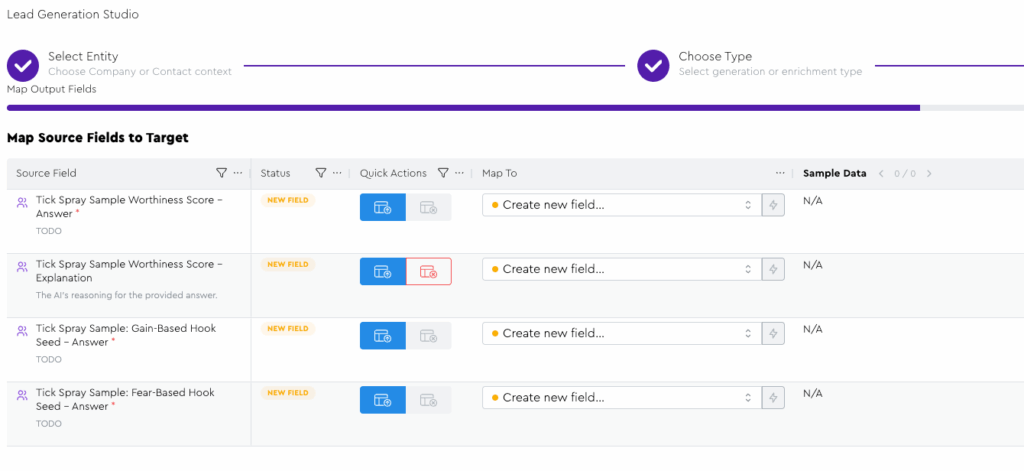
But in this case, I am going to keep them toggled on because I have a not-rooted-in-fact belief that LLMs produce better output when they have to justify themselves to you.
So, ensure all your mappings are set to “Create new field” and click the “Next” button at the bottom right:
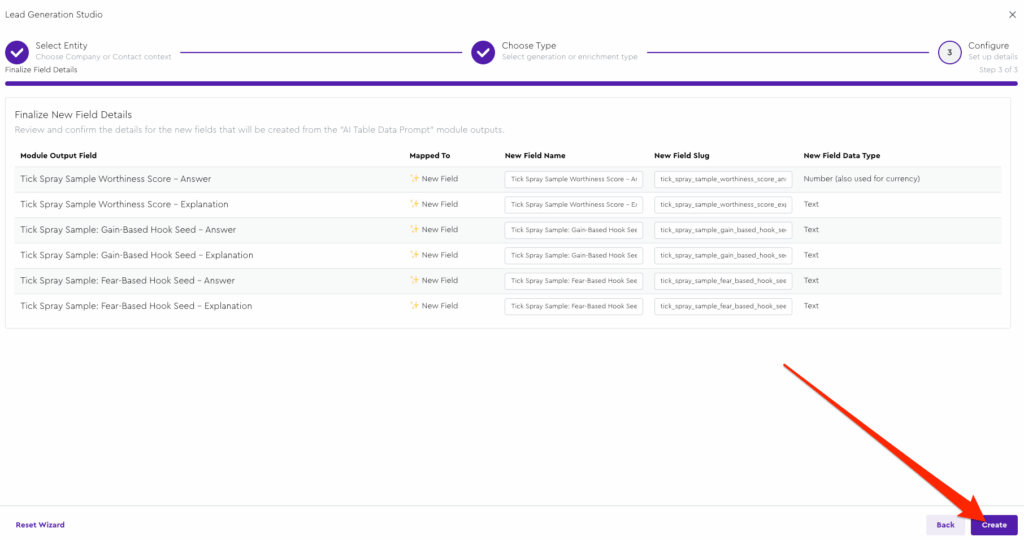
Leave the field names as-is on finalization – or customize them if you want – and click “Create” to save out the data module:
You should be taken to it on your Contacts grid in the Enrichment Tool Panel:

We’ll pick up from here in the next lesson.